Image library
The University image library stores our high-quality photography. The images fit with our house style and are the correct resolution (high enough quality) for print.
All University staff and our approved suppliers (those on our Communications supplier frameworks) can access the image library.
If you commission new photography, please upload and share your best images. This saves money, avoids duplication and gives us all more images to choose from.
The image library is managed by the Communications and Engagement team. If anything in this guide is unclear or if you can’t find the information you need, please email the Communications Production team.
This guide is for you if you’re:
- creating print and/or digital assets
- commissioning an advertisement or campaign to be run in print or on digital platforms.
The guidance covers what to consider before commissioning new photography and how to use the image library, including:
Tagging your images (metadata)
Categorising your images (metadata)
Before commissioning new photography
Before you start, you should talk through your requirements with Communications and Engagement or your faculty marketing manager because there may be suitable existing photos or plans to commission similar work. Further guidance on commissioning new photography.
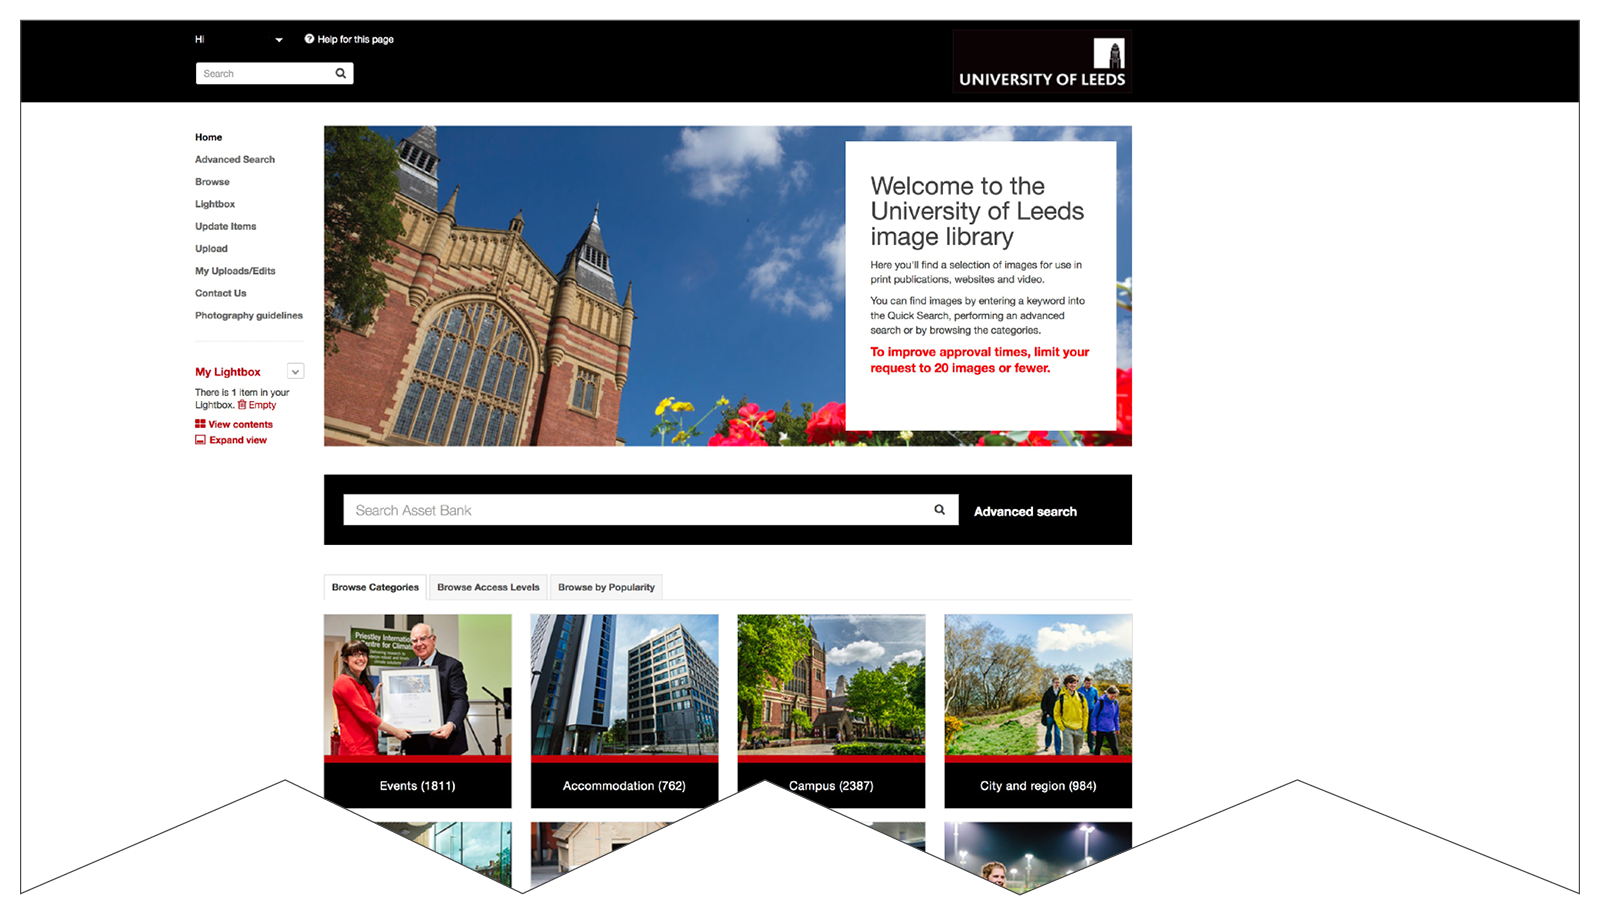
Check the University image library - for existing commissioned photography. As a member of staff, you have automatic access to the image library. Use your usual University of Leeds username and password to login, search and download.
How to use the image library
Navigation
Login
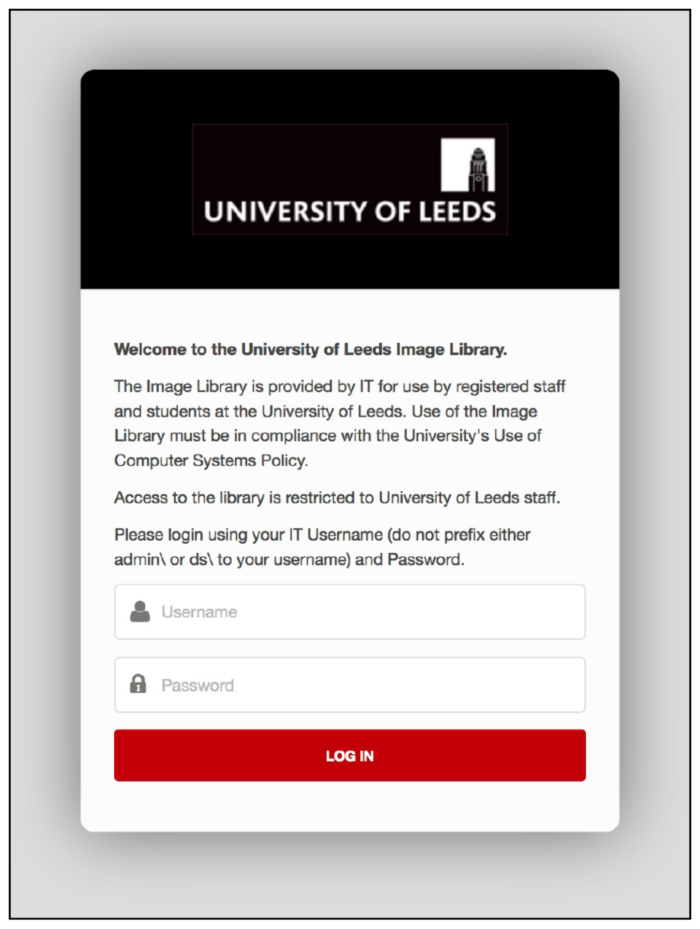
The image library is web-based and can be accessed on and off campus via any browser. You can log in to the image library with your IT user name and password.
Home page
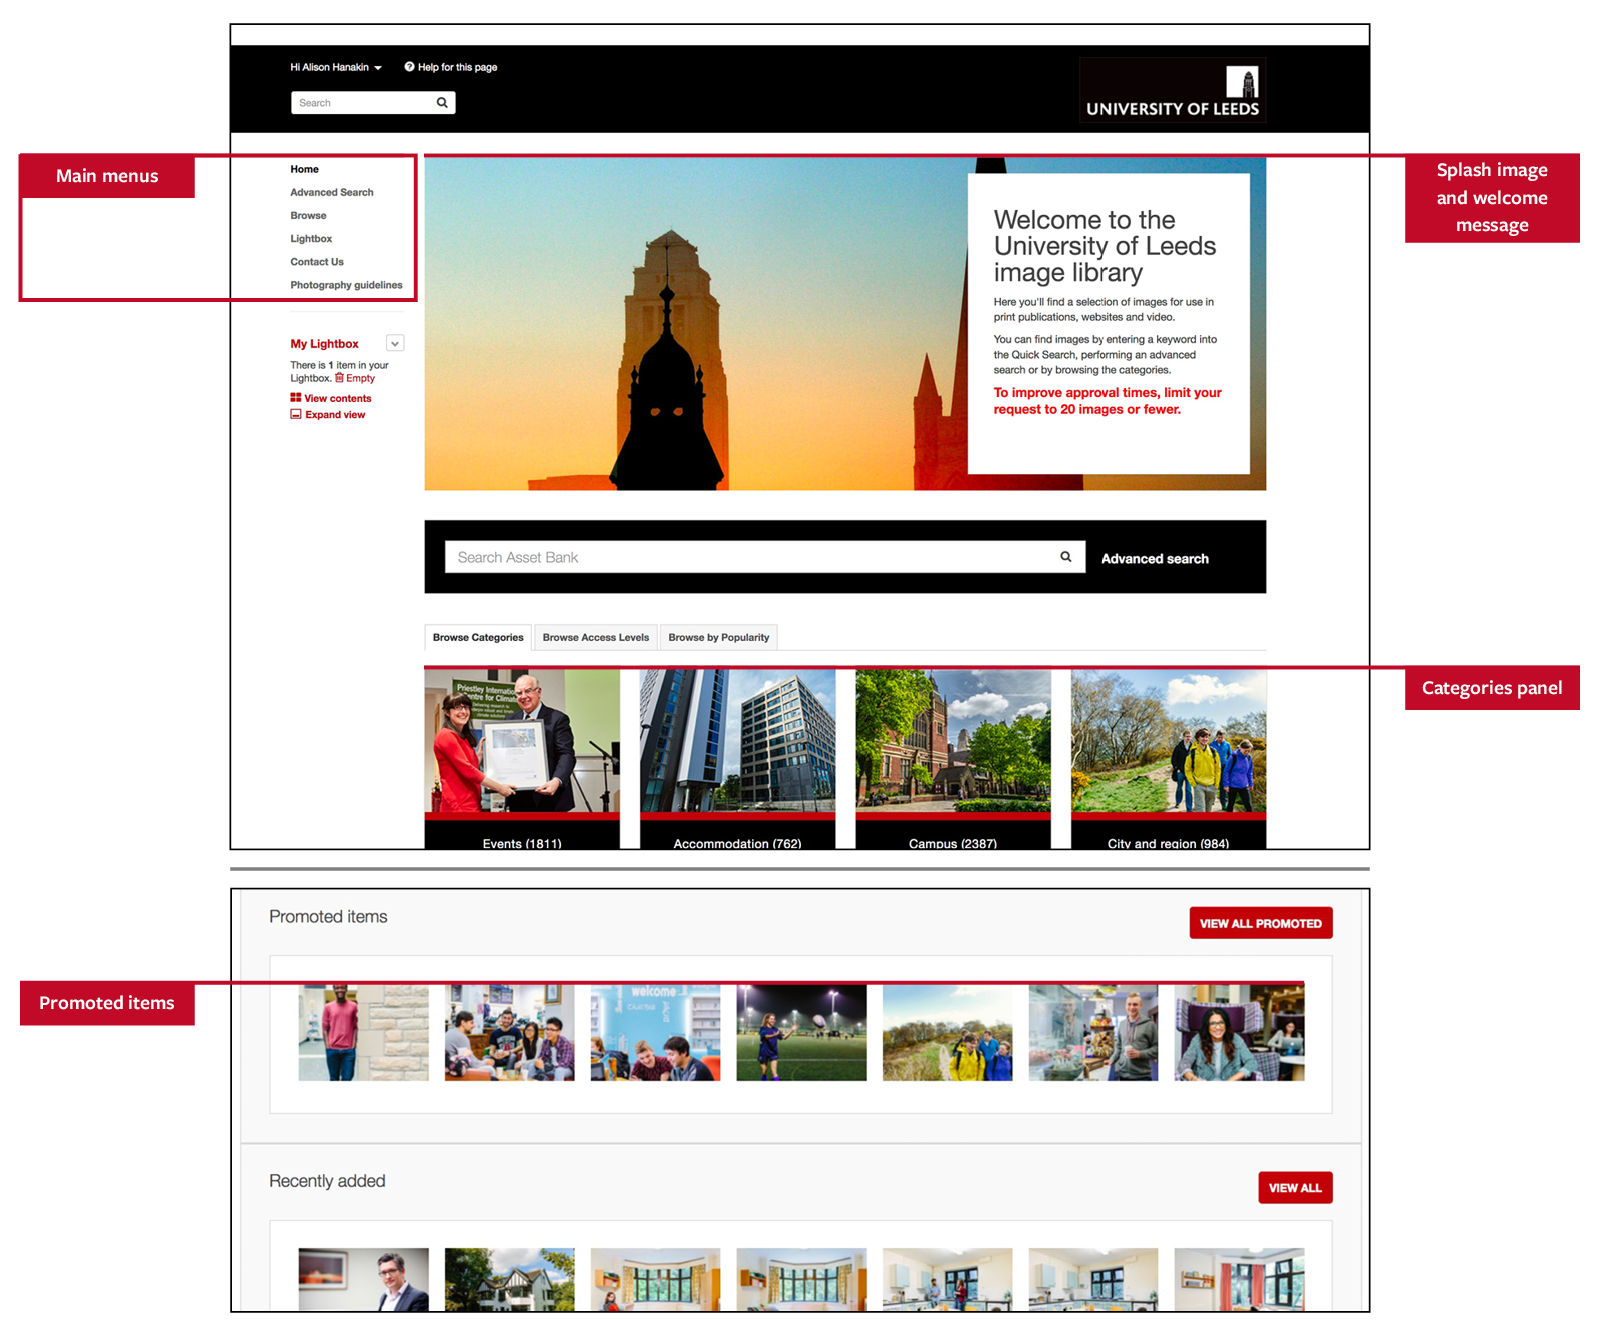
Once you have logged in you will be on the image library home page. You will see a welcome message and splash image, as well as links to categories and promoted items.
Menus
The left menu offers several options, which will differ depending on your access levels. For example, if you have upload privileges then Upload will appear in the menu. In the examples that follow we will be looking at a standard account, used for requesting images for download.
For accounts that have upload privileges, please see the Uploading section.
As a standard user with the ability to request images for download, you will see the following menu options on the left side of your home page:
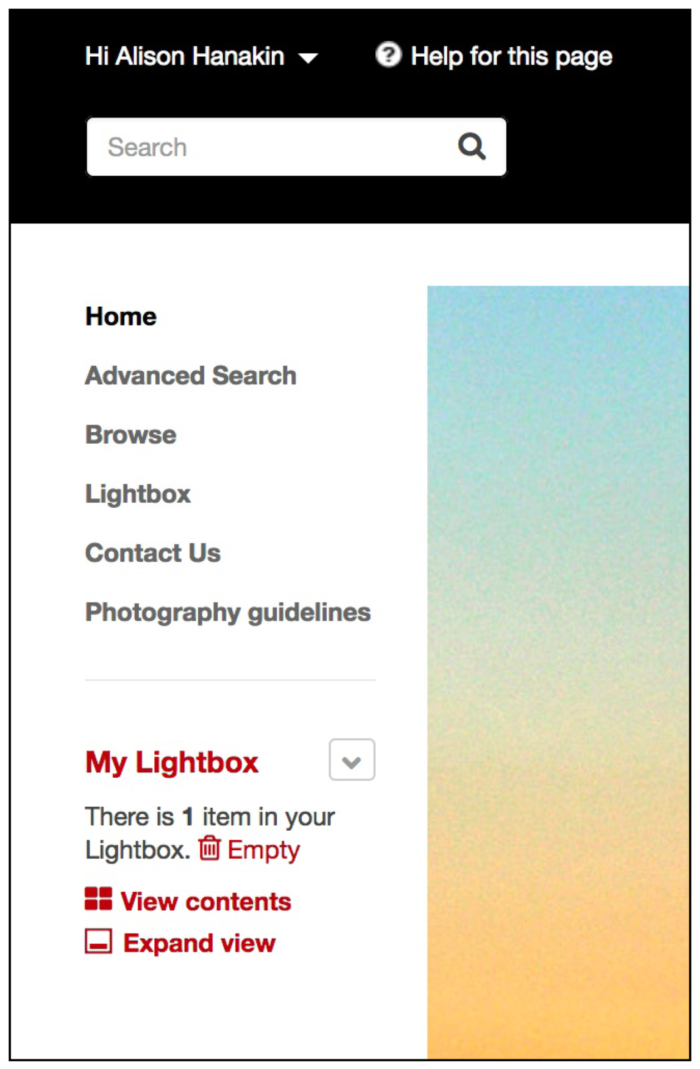
Under your user name you will see the Search text box. There is also a larger search field in the middle of the home page. Type a keyword in this box to find the image you are looking for. Both search boxes provide the same function.

The Advanced Search menu item allows you to be more specific in your search, for example if you are looking for a particular file type and/or size.
The Browse menu item allows you to search images by categories, access level and popularity.
The Lightbox menu item is where you will find any images you select. Read more in the Downloading section.
The Contact Us menu item provides a contact form to send to the image library administrators in the Communications and Engagement team if you have any problems.
The Photography guidelines menu item provides a link to the University guidelines on commissioning new photography, which you will need if you can’t find suitable imagery on the image library.
The My Lightbox area is an overview of your Lightbox, so you can quickly see how many items you have saved. Read more in the Downloading section.
Downloading
Selecting your images
- To begin your search, simply type the keywords related to the image you are looking for into the search bar. This search may also include video clips and is, by default, ordered by date of upload. You can change the ordering by clicking on Refine results or Options at the top right of the screen.
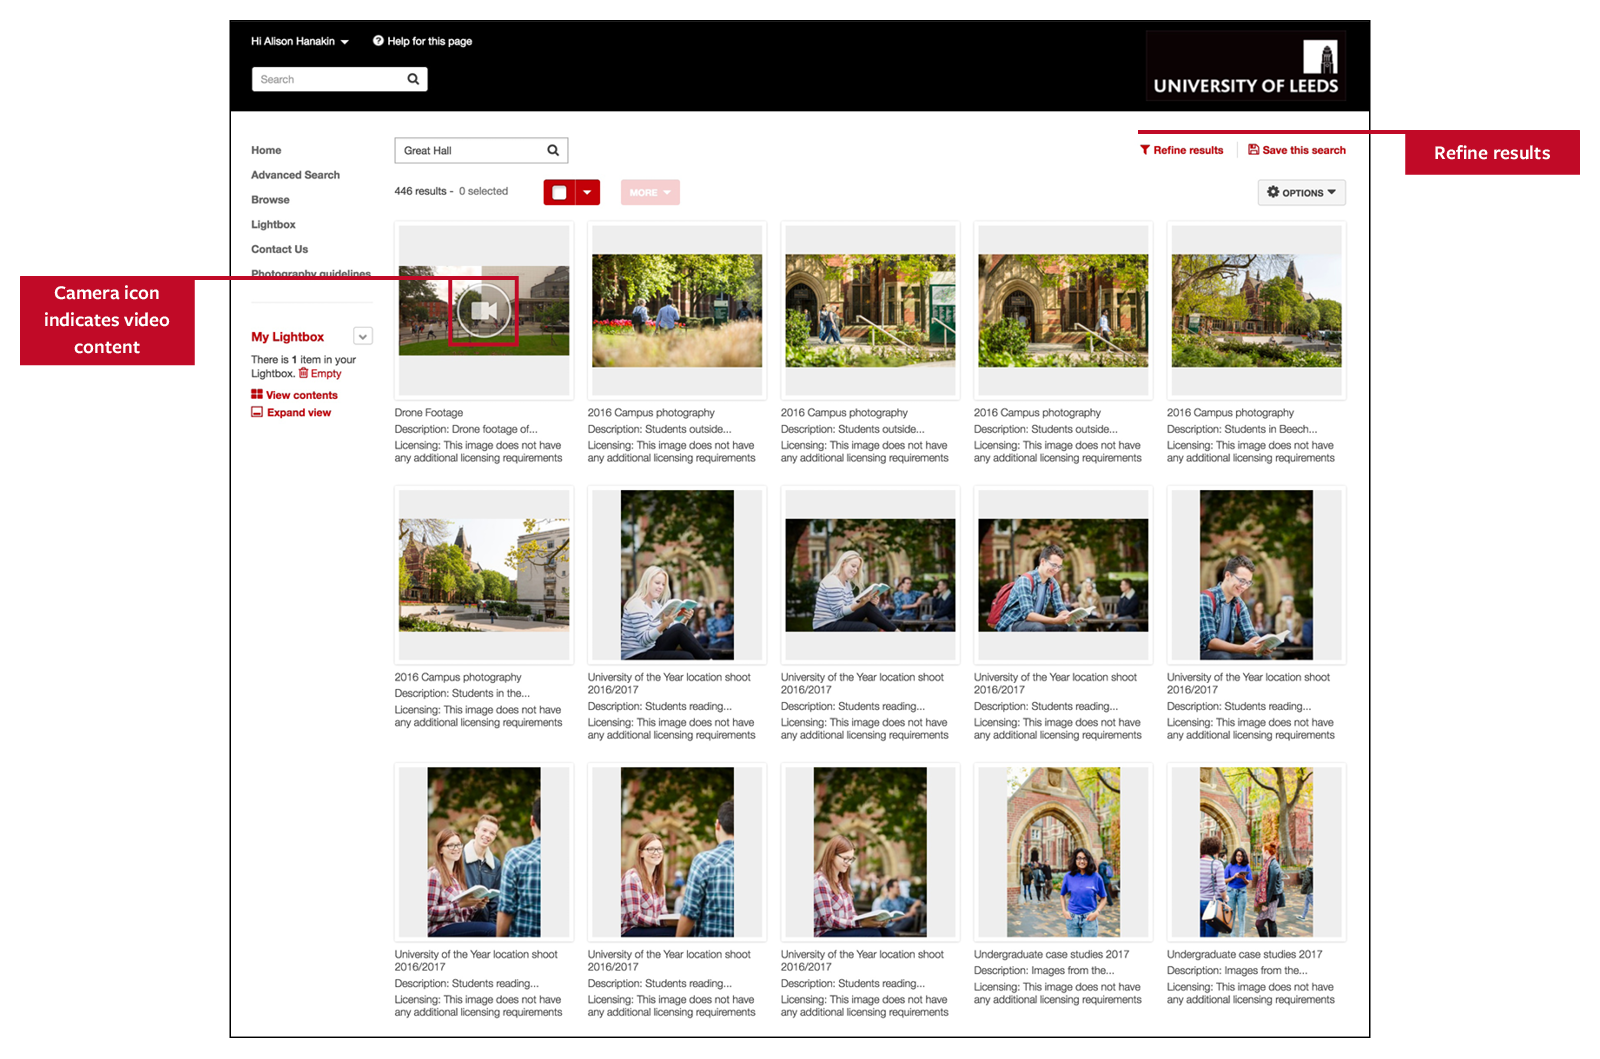
- If you only need one image from your search results, click on the plus symbol in the bottom right of the image, to add it directly to your Lightbox.
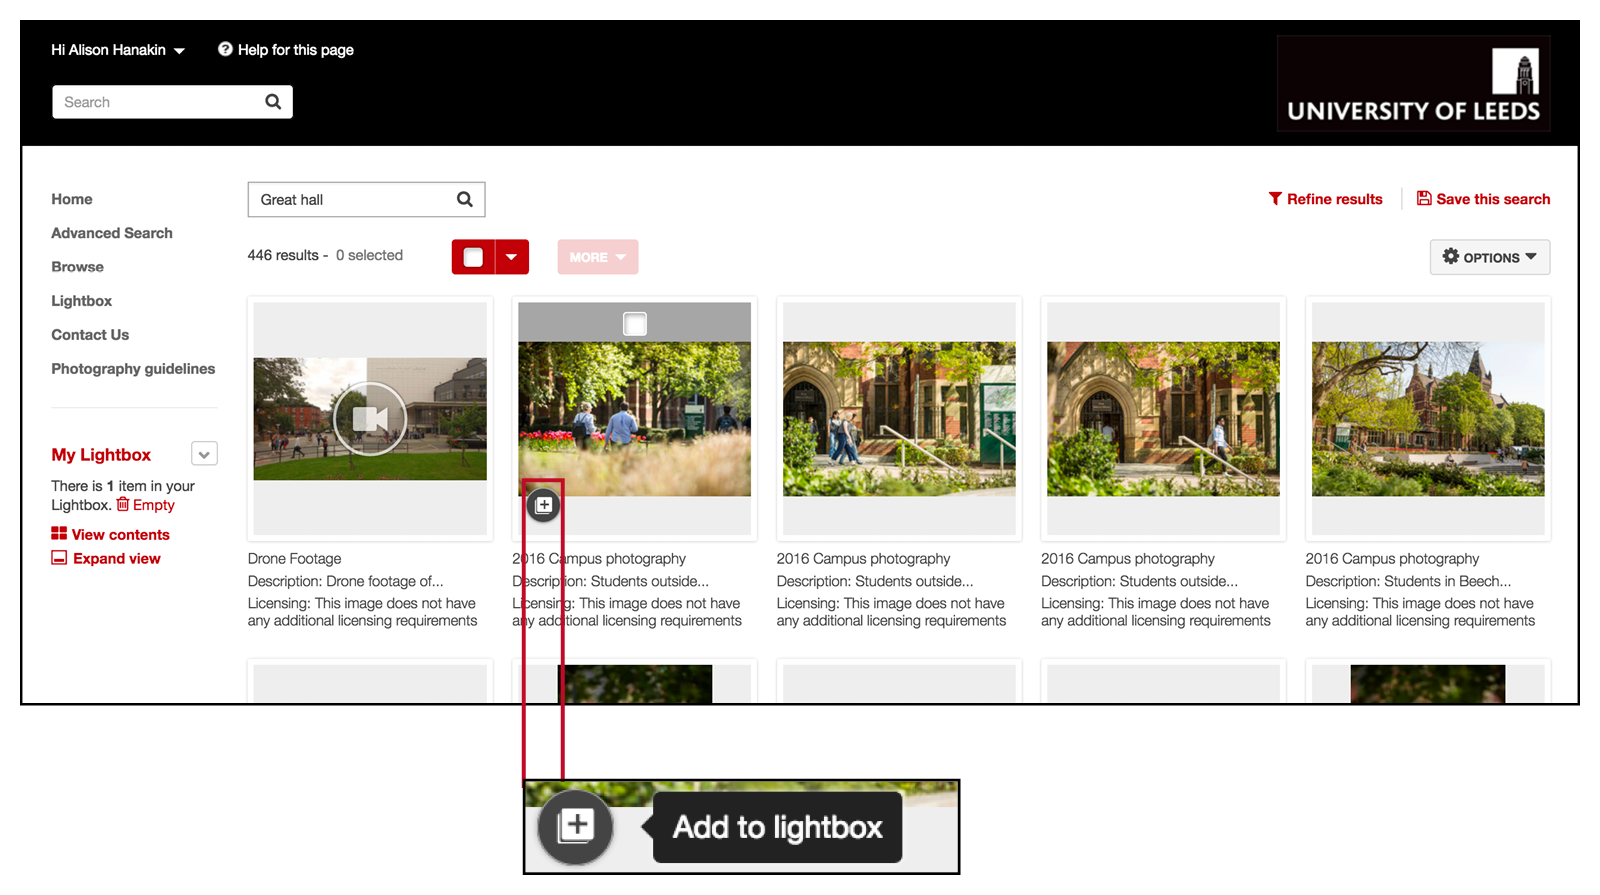 If you want to add multiple images from your search results, click on the tick box that appears at the top of all the images you require.
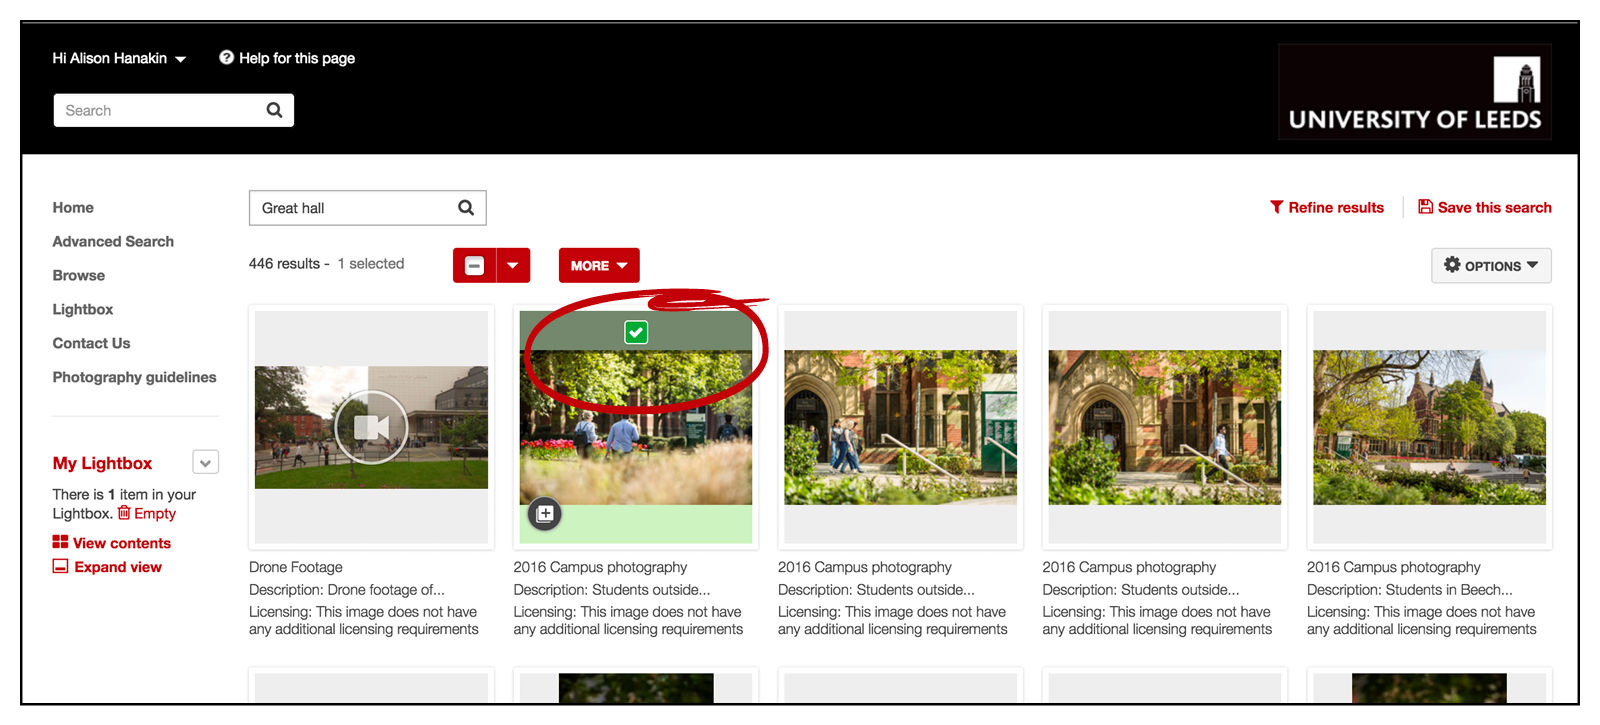
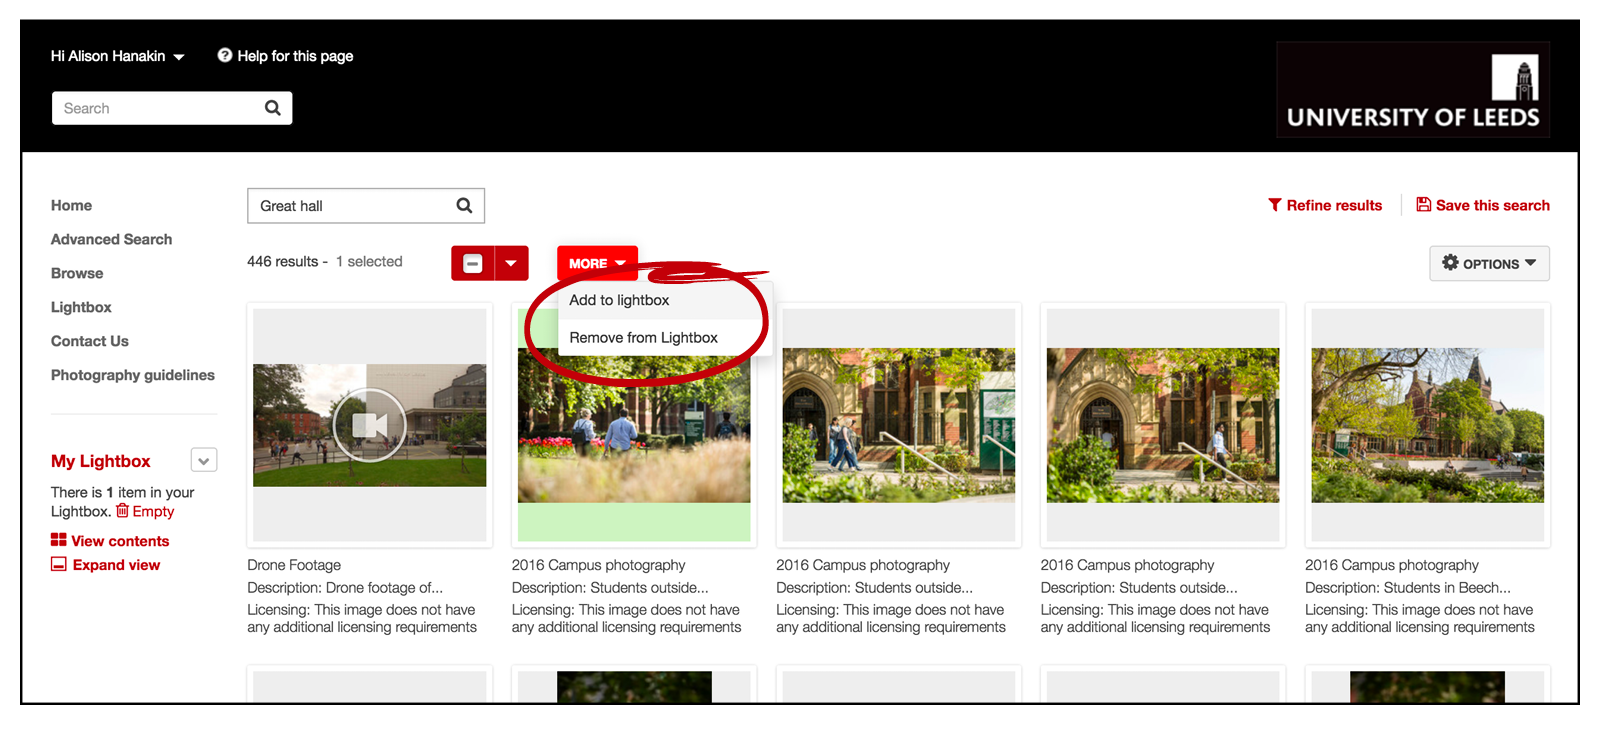
- If you have selected multiple images, and want to add them to your Lightbox, click the More drop-down menu button at the top of the page and select Add to Lightbox from the menu . The image(s) will then be saved within your Lightbox and your 'My Lightbox' section will be updated to reflect this change.
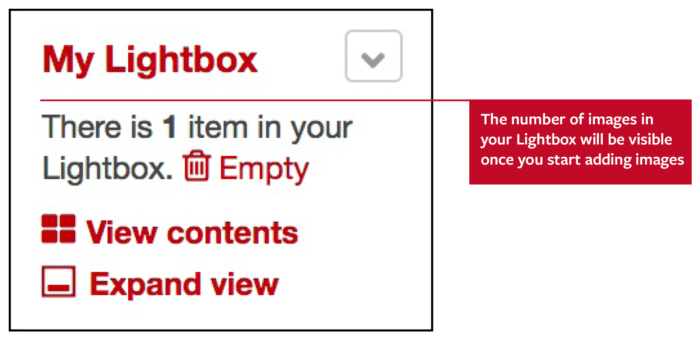
You can keep these images in your Lightbox indefinitely. To download these now, see the Requesting approval section.
You should only request a maximum of 20 images for download. This helps the Communications and Engagement team manage approvals quickly.
Requesting approval
Your Lightbox stores the images you have selected. This area is personal to you and images will stay in there until you remove them. You can access your Lightbox area from the left menu on all pages, from either the Lightbox or the 'My Lightbox' menu option.
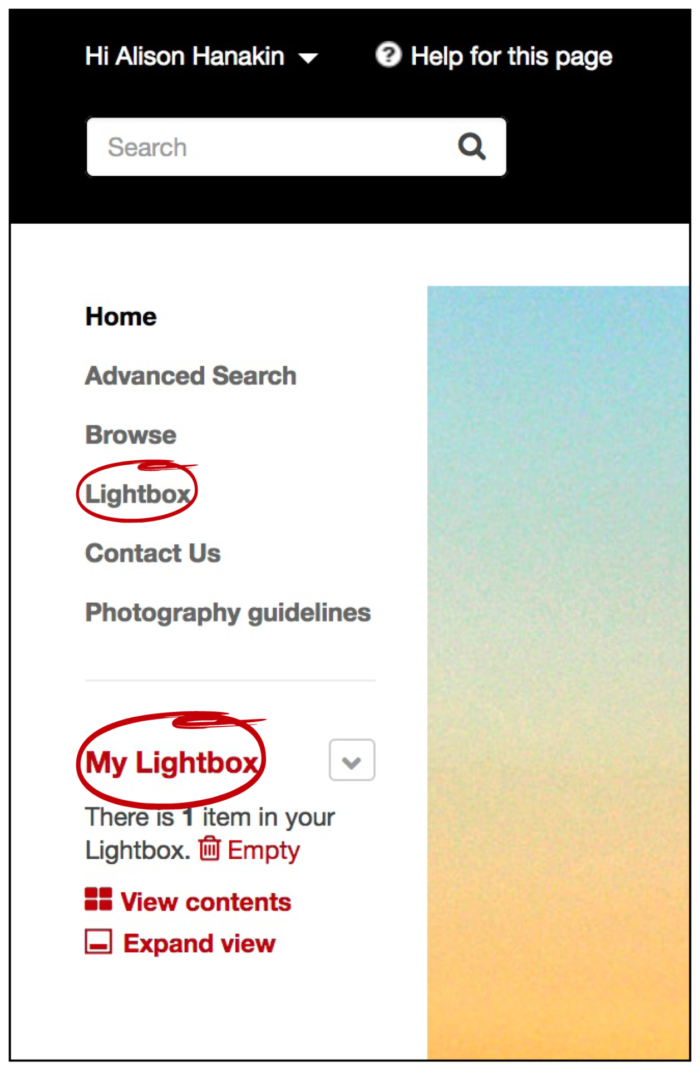
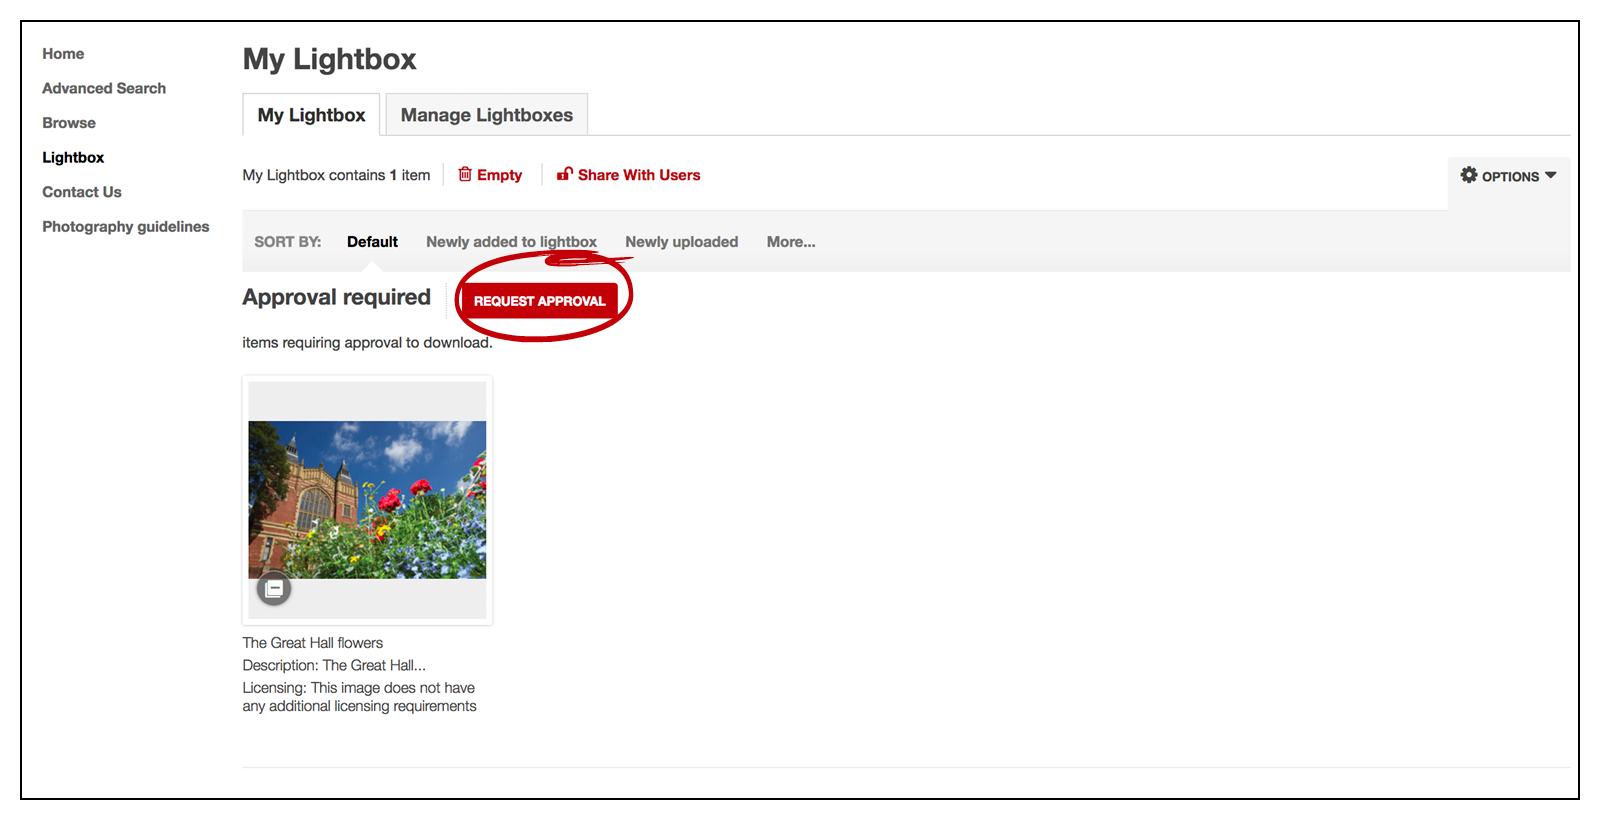
Once you open your Lightbox you will see all the images you have added and a notice that approval to download is required.
Please check the ‘Licensing and Description’ fields to see if the image has any restrictions placed upon it. You may need to contact the person that uploaded the image for approval to use in advance.
Approval of images is necessary to ensure that copyright is not breached; and use of incorrect or inappropriate images for certain audiences is avoided.
-
- You can request approval by clicking the Request approval button.
- After clicking Request approval you will be taken to a screen asking you to provide mandatory details on how you will use the image:
Select one of the drop-down options, ‘Full size’, ‘Website’ or ‘Other’. Choose ‘Full size’ for high-quality print items, eg a brochure. Choose ‘Other’ for any use except print or on a website, eg use in a presentation or on merchandise.
In the ‘Your notes’ section, give some details, eg the name of the publication/website and the promotional activity. This field helps the approvers to process your request quickly. Leaving it blank will result in your request being rejected. The ‘Copy these values ...’ link lets you quickly copy your responses in both fields to the rest of your image requests.
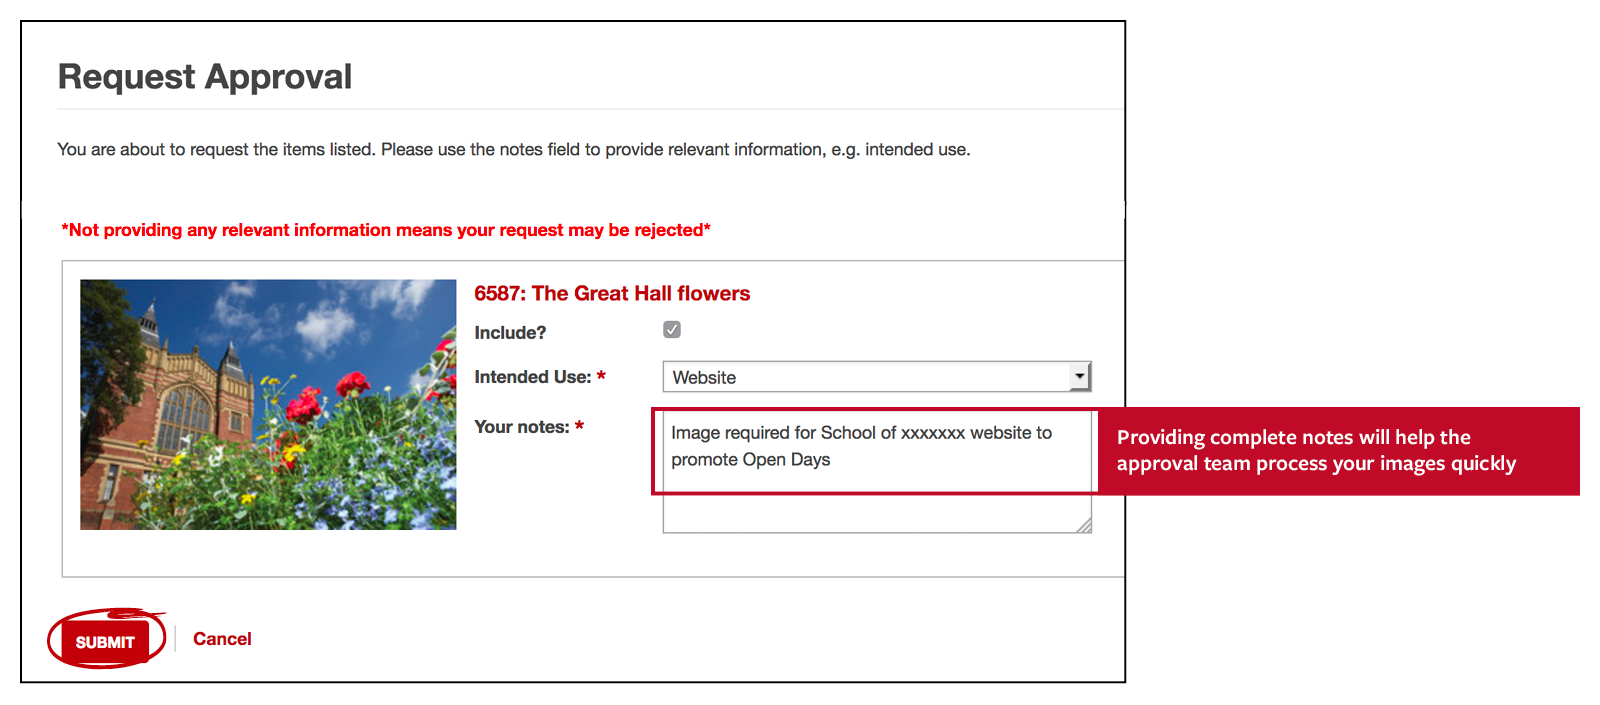
- Once you have provided this information, select the SUBMIT button.
- This will automatically generate an email that is sent to the Communications and Engagement team. There are several approvers in the team, so we will try to approve your request within 48 hours.

- You will receive an email when your request has been approved or rejected, with instructions about your next steps in each case.
- You can request approval by clicking the Request approval button.
Uploading
Uploading a single image
Staff with upload privileges are typically people who commission photography, such as members of marketing teams. If you have upload privileges and want to upload assets, the below steps will show you how.
- Click on the Upload option in the left menu, which will give you the below screen.
- From here you can either click the ADD FILES button or simply drag and drop files into the grey box.
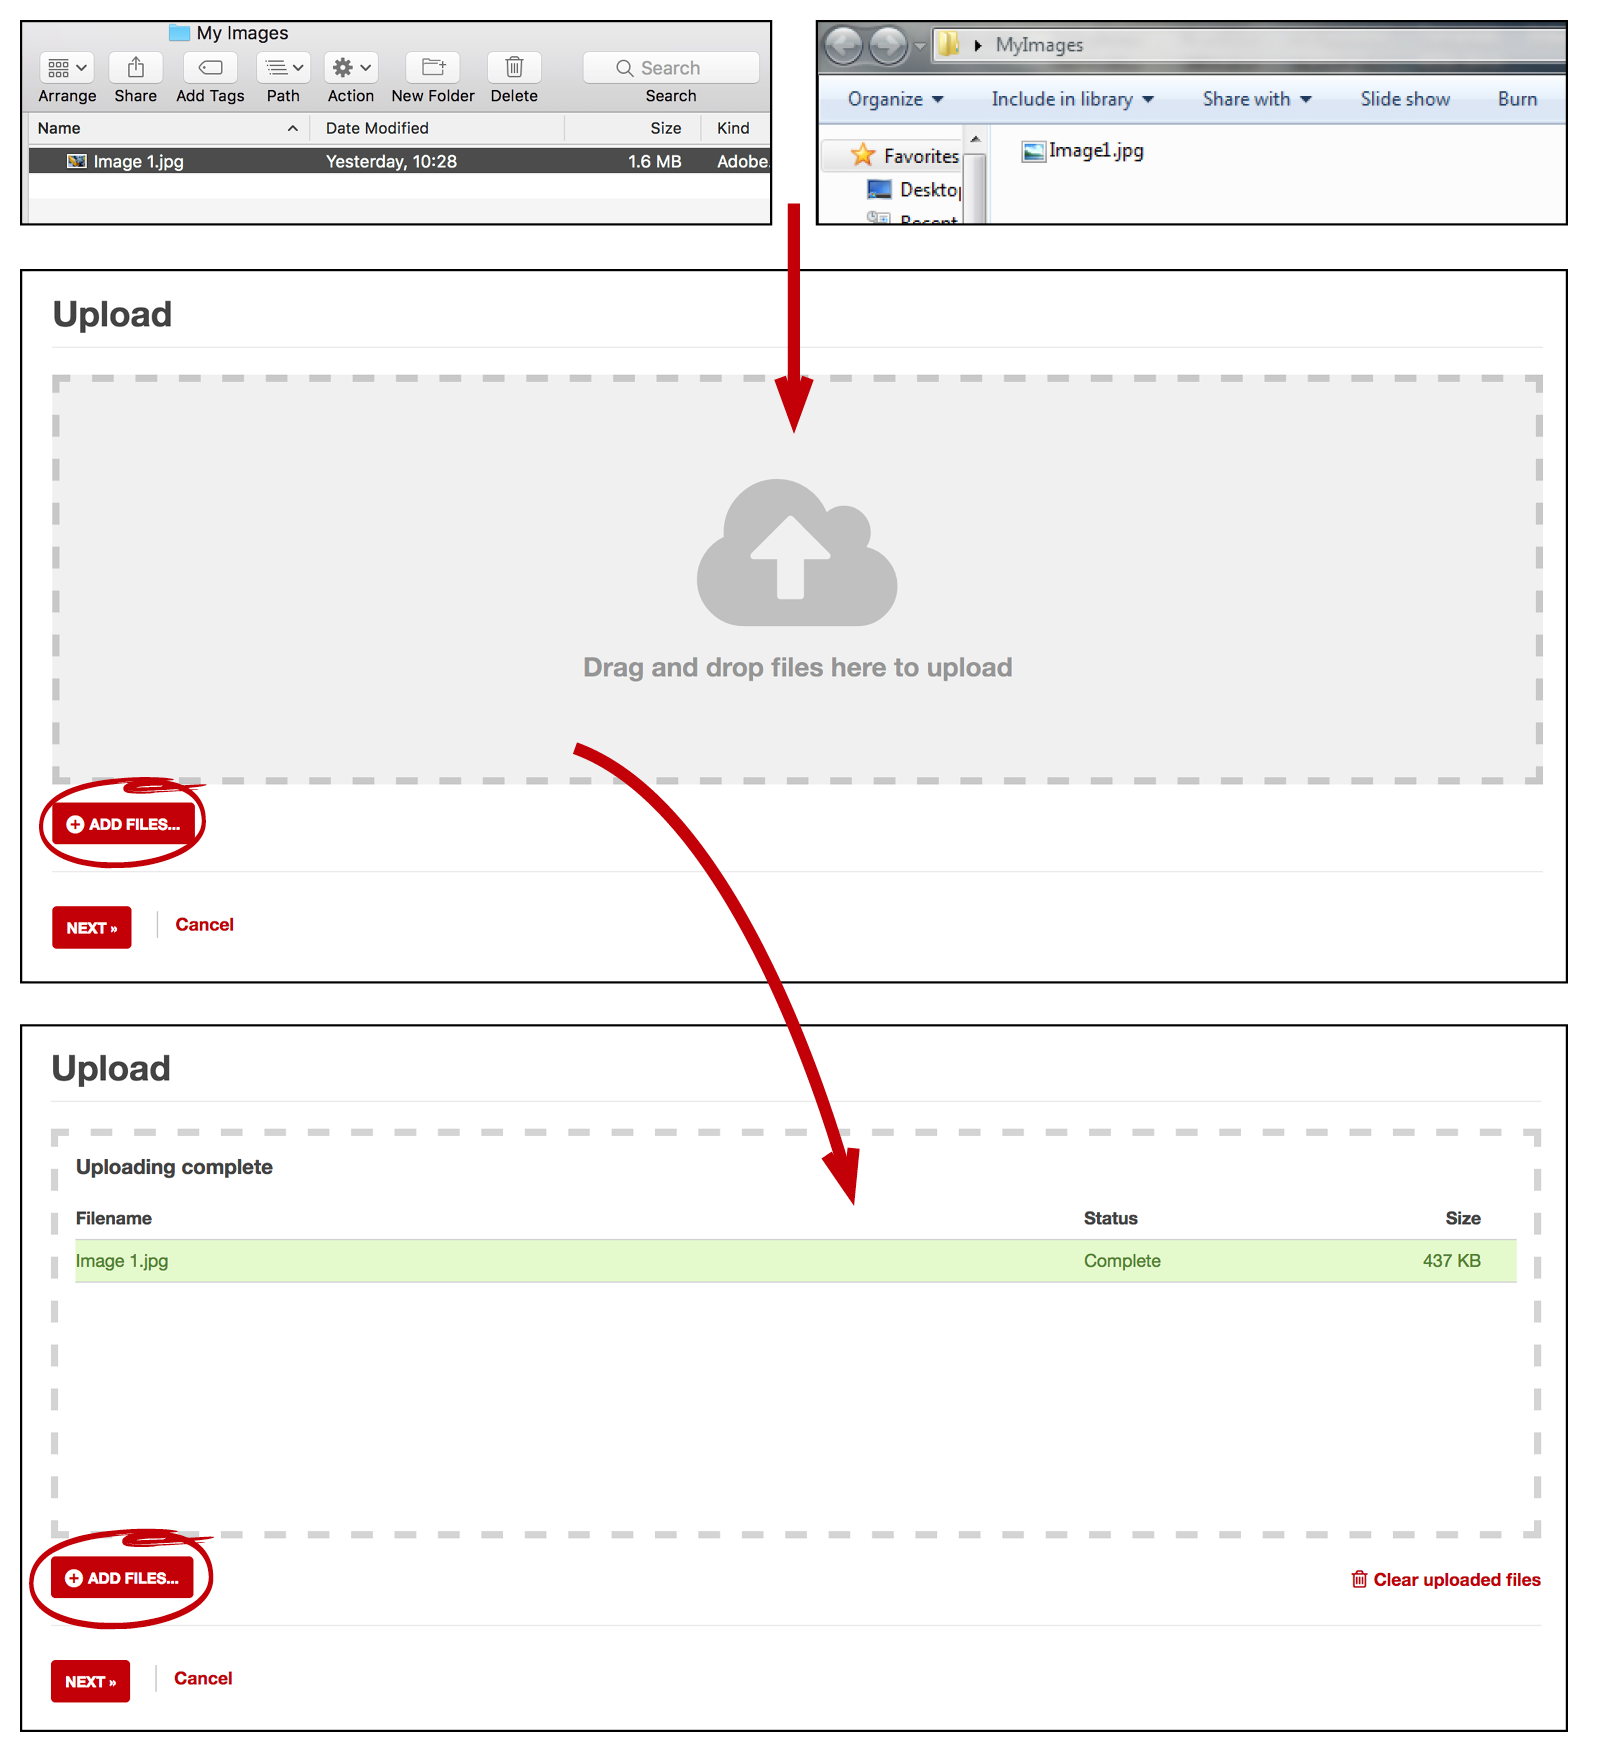
- You will see a progress bar as the image is uploaded – you will need to keep your browser window open for this to complete
- After the upload process has completed you can select the NEXT button
- You will then add metadata for your image (see tagging your images). Then click Save and continue.
You should upload:
• a selection of images from your photoshoots that you are happy to be used by the wider University community.
You don’t need to upload:
• hero shots (your main campaign images) or images that are exclusively for use on a specific campaign if you don’t want to
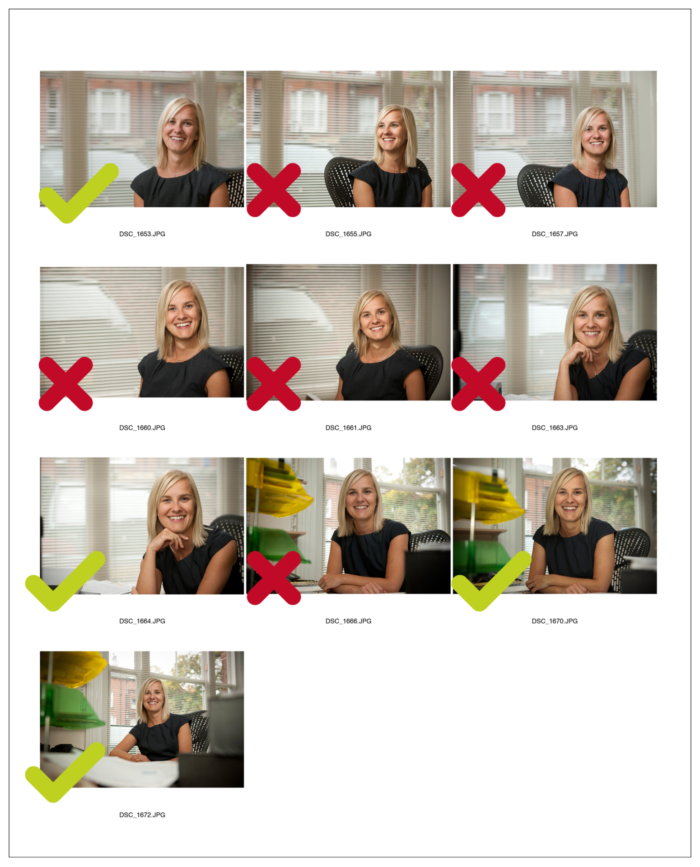
• multiples of similar images from the same shoot – choose the best images from your shoot. For more advice, see Uploading multiple images below.
Uploading multiple images
Don’t upload your entire shoot please. We don’t want more than one version of the same image, so select the best images from your photo shoot before uploading.
We recommend that you only enter a brief title and description, as well as setting the mandatory access levels at this stage.
-
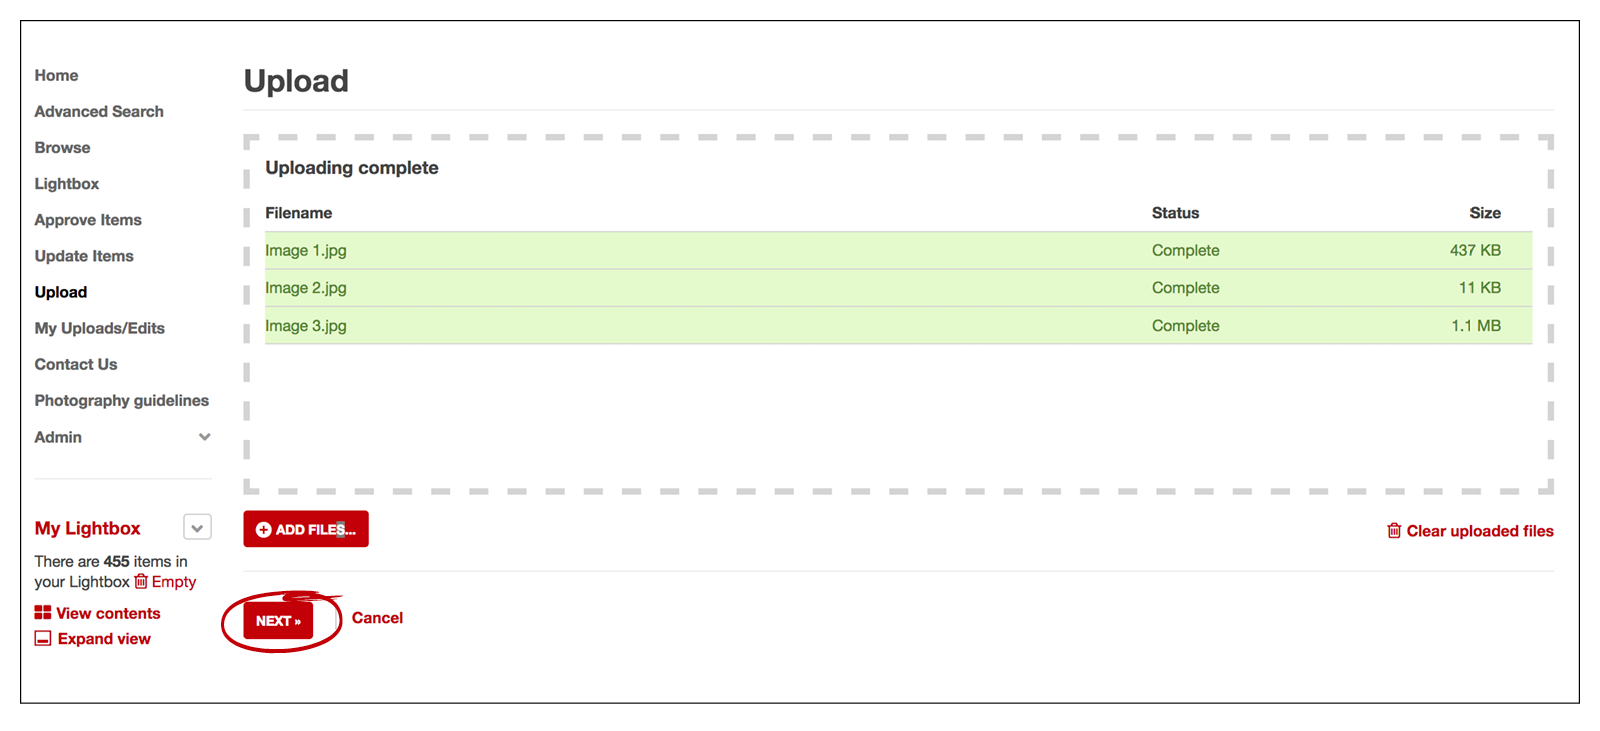
- Uploading multiple images is called a bulk upload and is done in much the same way as a single image. After the upload process has completed you can select the NEXT button.
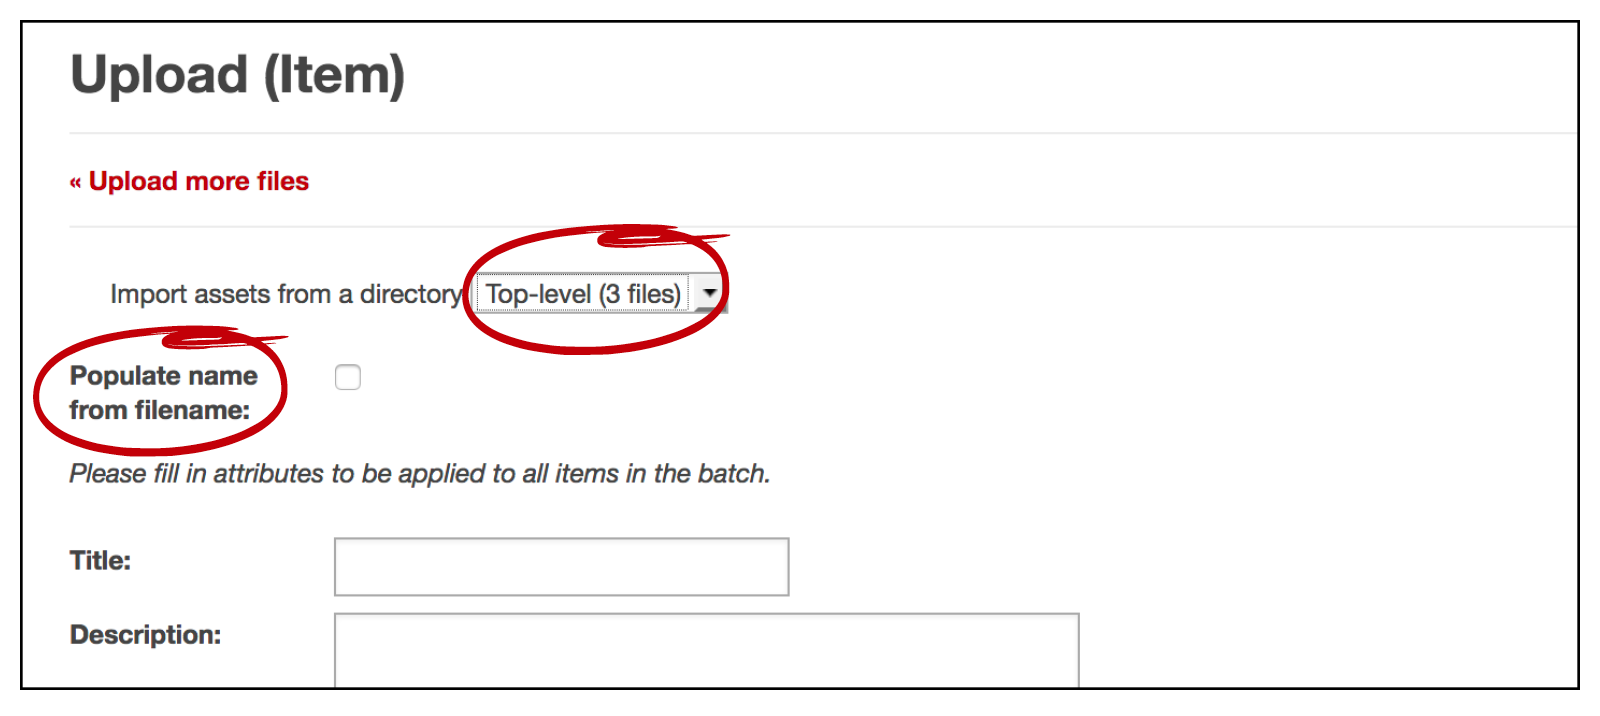
- Unlike a single image upload you will not see a preview of your images, instead you will see a drop-down box containing the words Import assets from a directory and a check box for Populate name from file name. You do not need to alter either of these areas.
- At the bottom of the page you will have the options to:
Link the items to each other – linking items means that when an item is viewed, all other items from the batch will be shown as thumbnails underneath as related items. Defer thumbnail creation – checking this means your items will be imported more quickly, but you may not see the thumbnails (small images) until later. This option is not recommended and should only be checked if you are short on time.
-
- You do not have to enter any data at this stage but any basic metadata you enter will be applied to all the uploaded assets.
- You may wish to enter any top level metadata that is relevant to all the assets in your upload.
- You can then add to and/or edit each assets’ individual metadata during a batch update (see below).
- If you are uploading many assets, the system may take some time to process the metadata and display them. In this case you will see a message box confirming progress.
- Once this process has started (ie you can see the message box stating that assets are being uploaded) you can navigate away from the page or close the browser and the process will continue.
- Uploading multiple images is called a bulk upload and is done in much the same way as a single image. After the upload process has completed you can select the NEXT button.
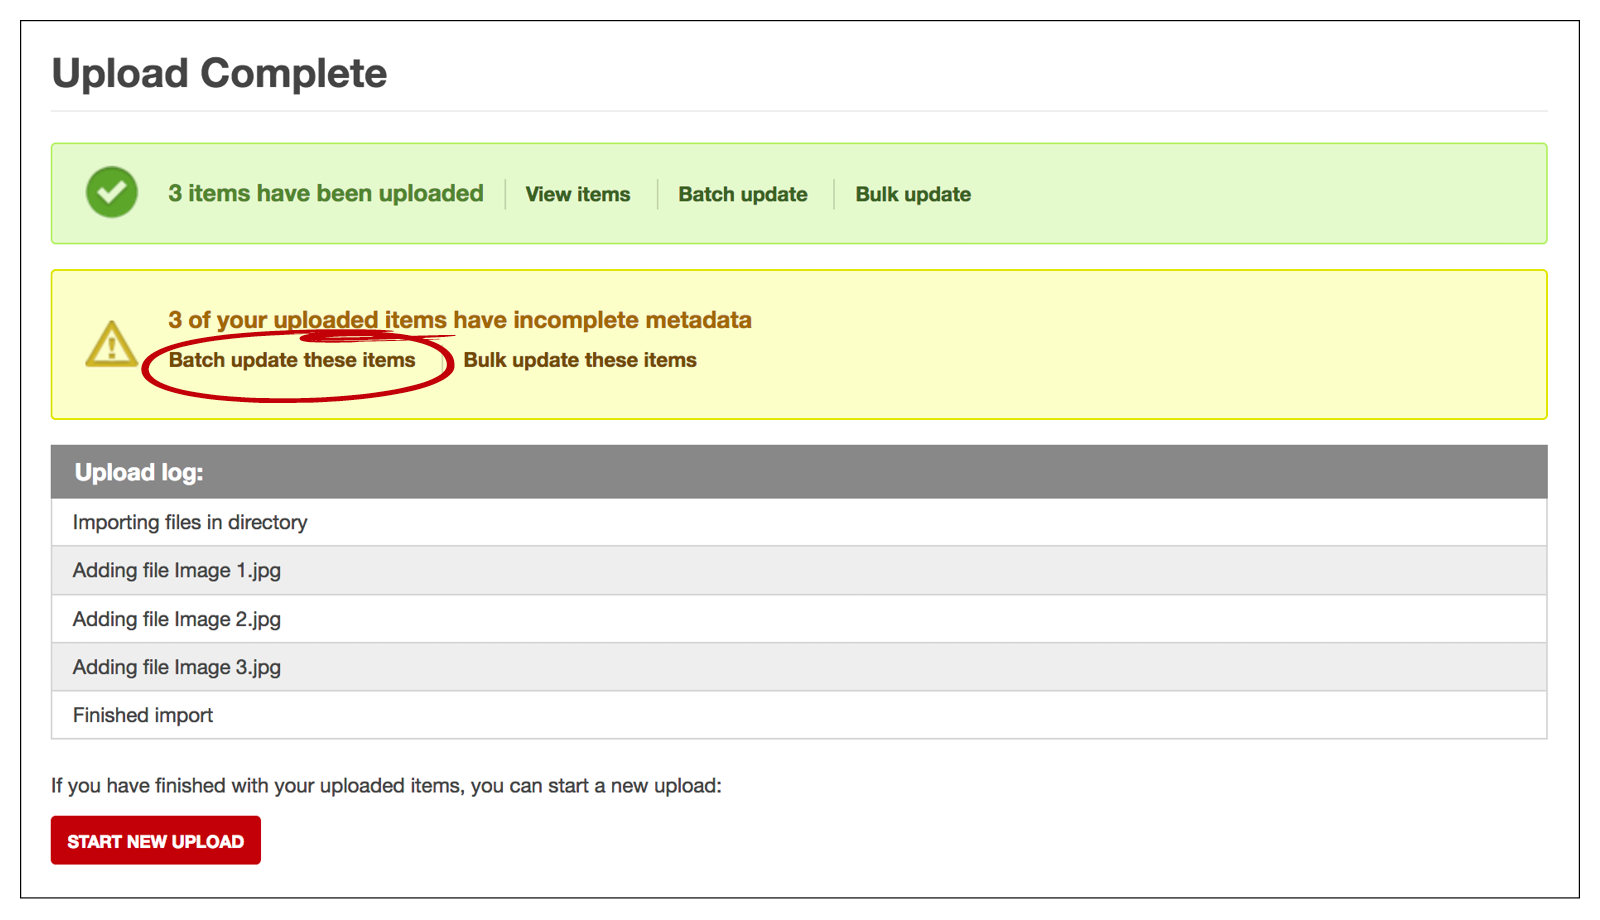
After a bulk upload you will be invited to perform a Batch or Bulk update on the selected assets. Select Batch update, as this is the way to add metadata that is specific to each individual asset.
After a bulk upload you will be invited to perform a Batch or Bulk update on the selected assets. Select Batch update, as this is the way to add metadata that is specific to each individual asset.
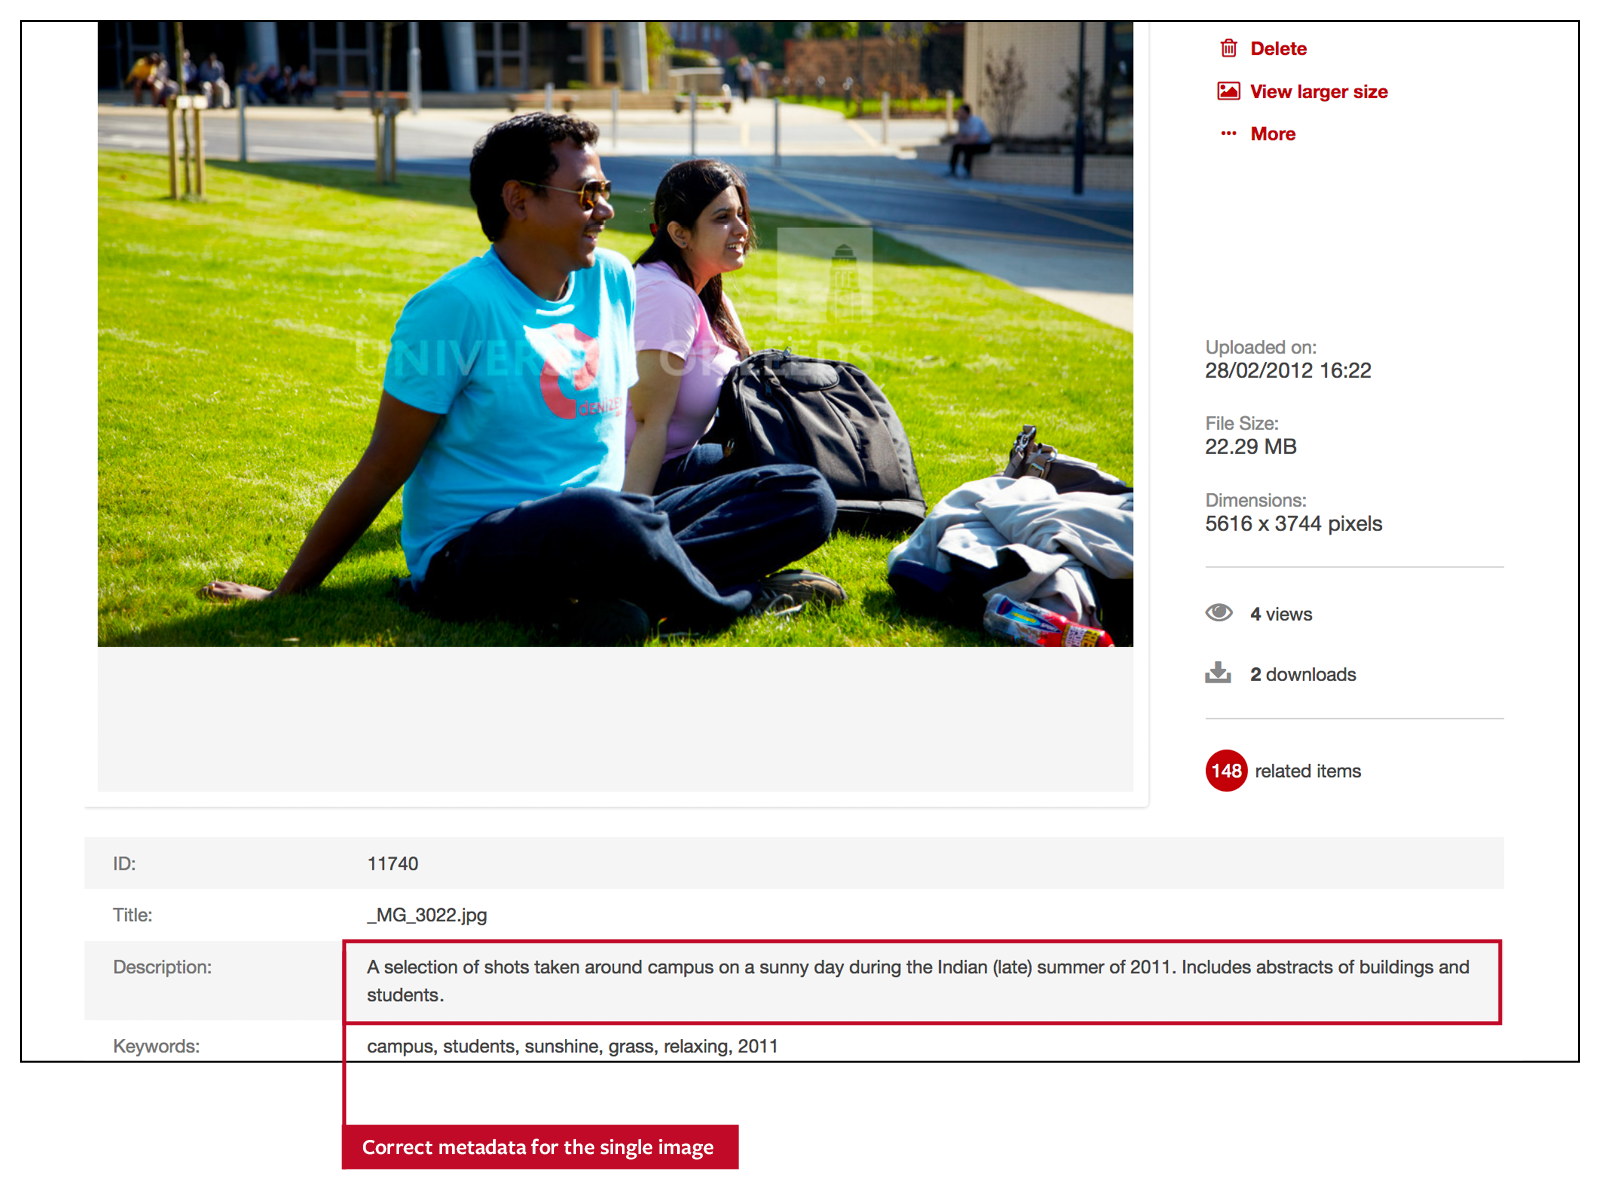
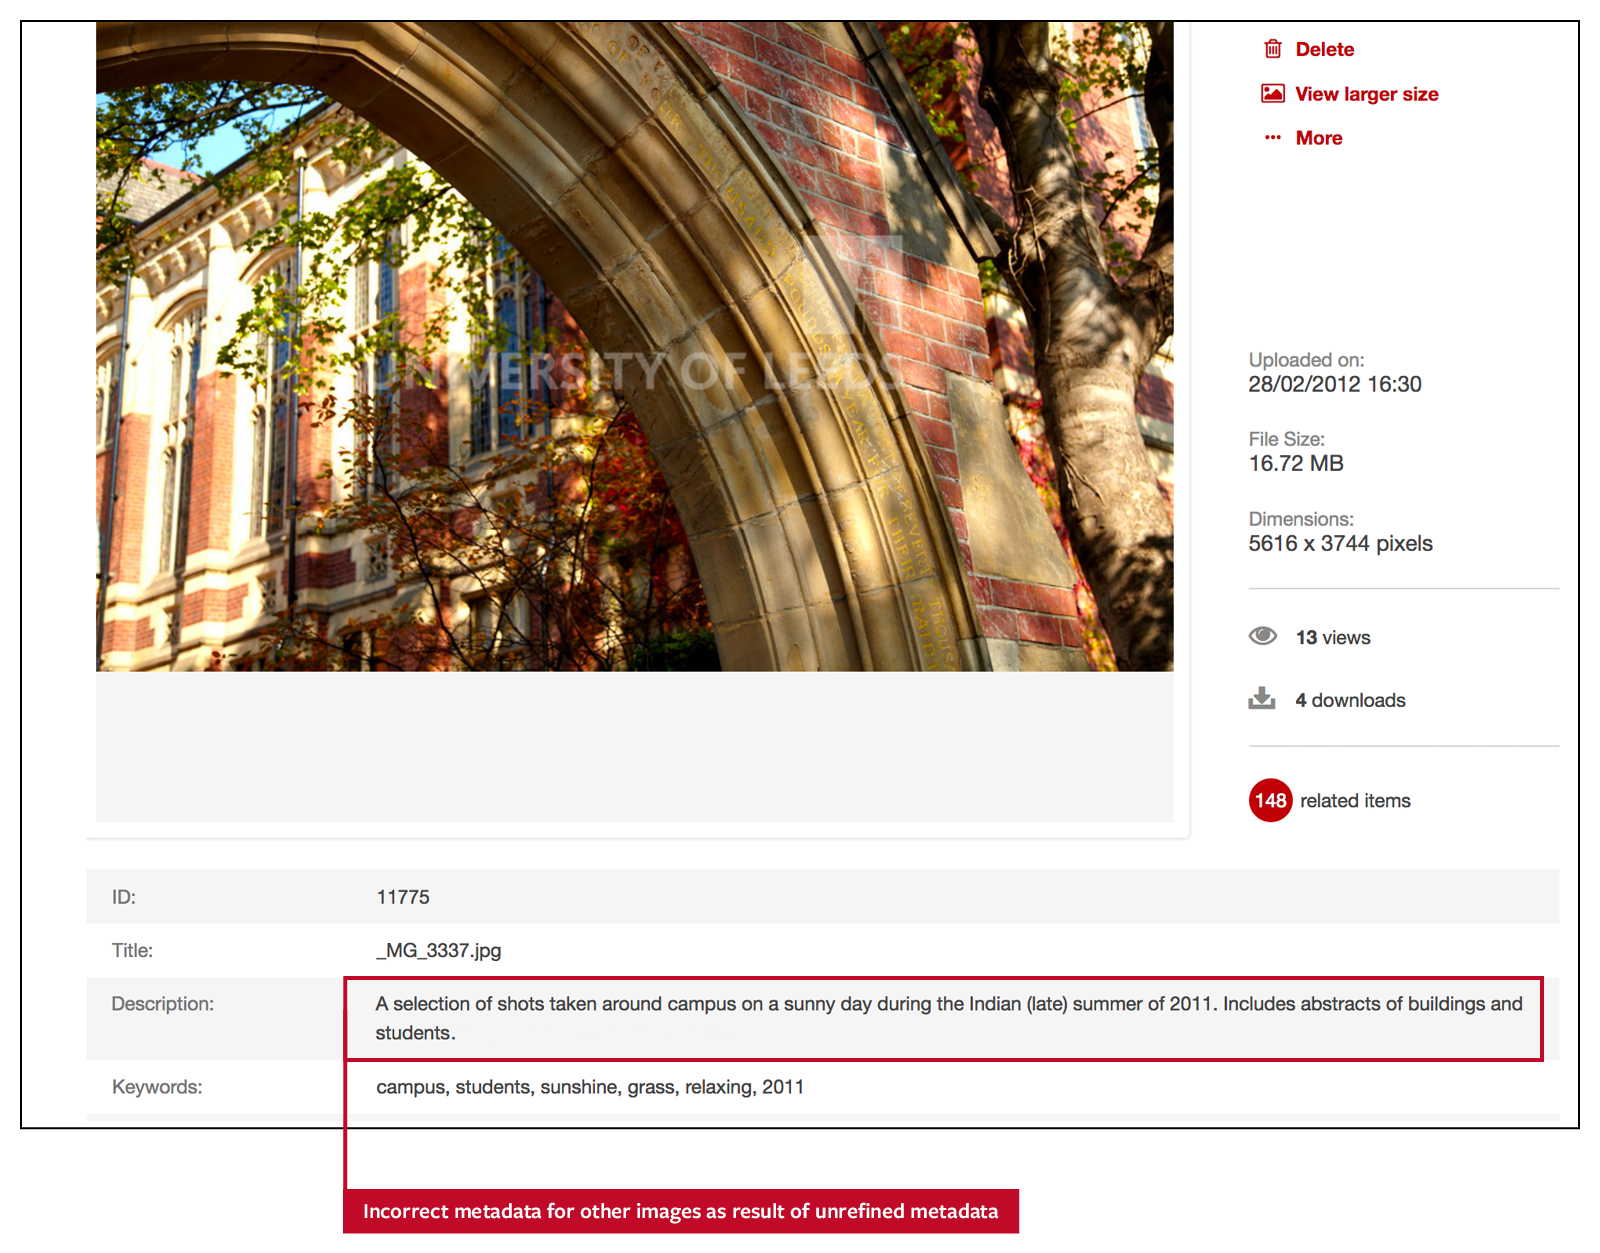
Don’t select Bulk update, as this will add the same keywords to the whole group – see example below. You will then update each image you uploaded in turn, add metadata as you would for a single image (see below) and then click ‘Save and continue’.
Tagging your images (metadata)
The title of this page will differ for single image upload and multiple image upload (Batch update). The process of adding your metadata is the same in both cases.
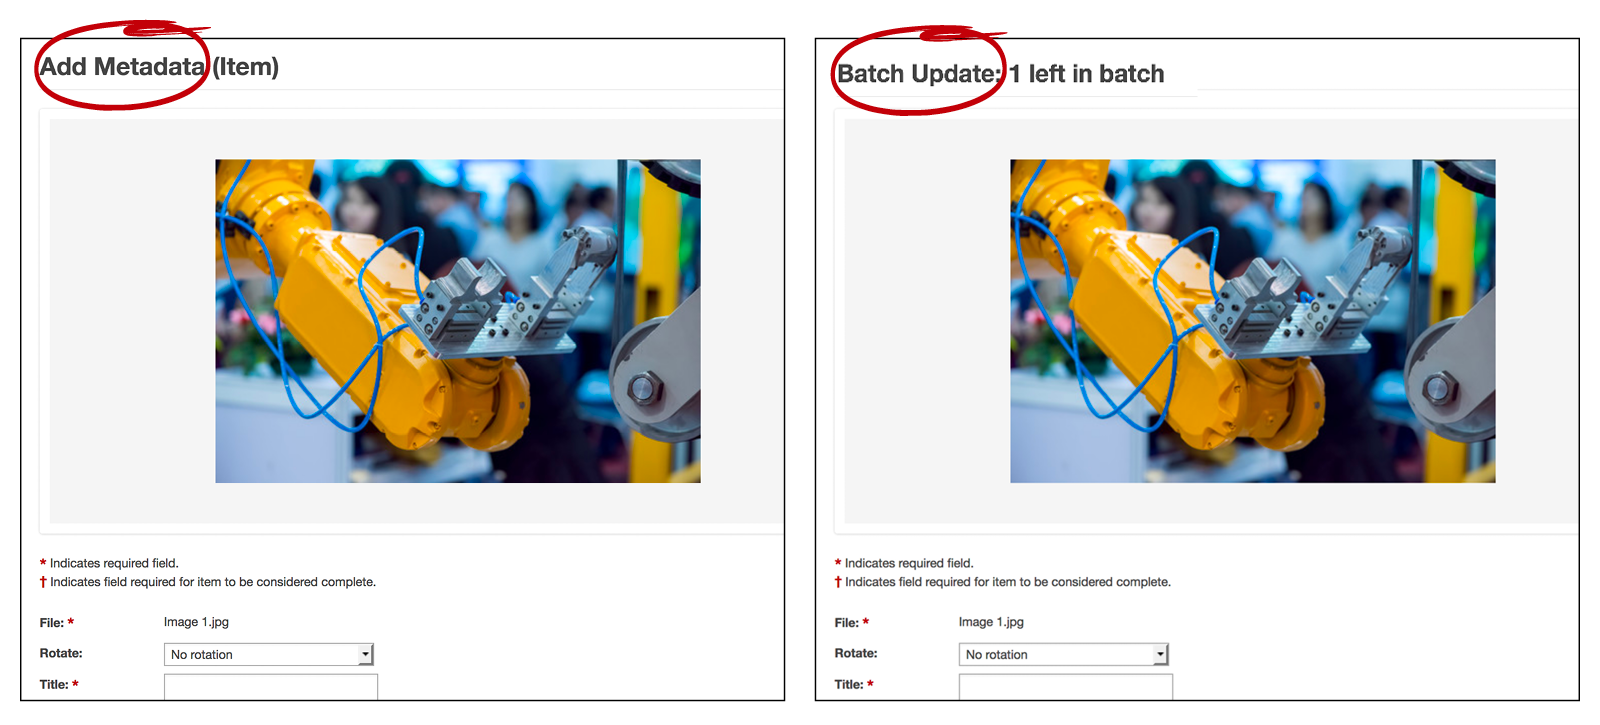
On this page you will see a preview of your image and a number of fields to enter your metadata. This is how you tag your images using keywords.
You should try to enter as much information about the image as you can. The more descriptive you are, the easier it will be for other users to find the image through search.
Fields marked with * are mandatory while fields marked † are required for your metadata to be considered complete by the system. We recommend you complete these fields at the same time.
- File – this field will already be completed, showing the name of the image
- Rotate – this field should be left as No rotation unless there is a good reason to change this, eg the image was originally in the wrong orientation
- Title – this should be as literal as possible, eg if the image is of the Great Hall, simply title it ‘Great Hall’. Use the description field to add additional information
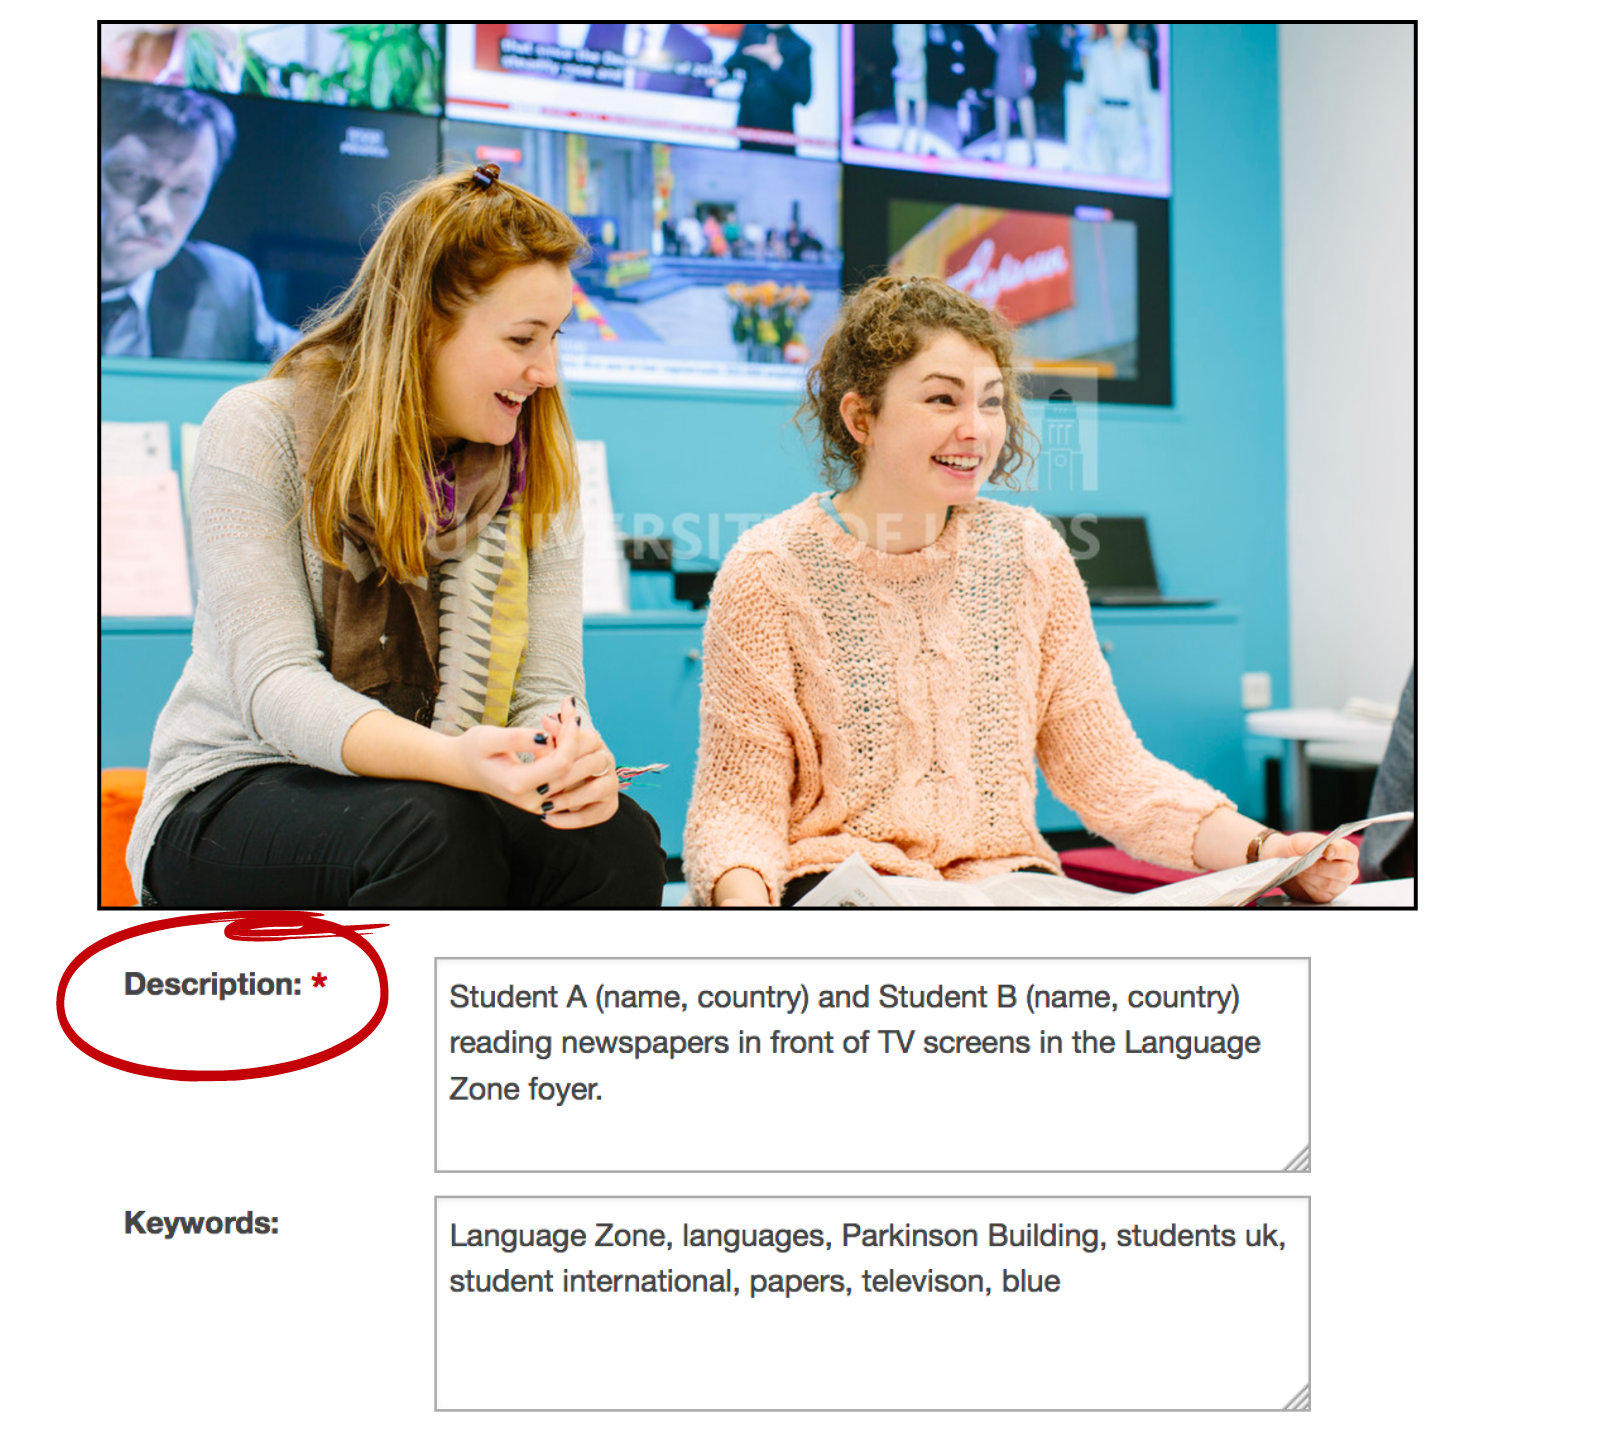
- Description – in this field you should expand on the title of the image. For example, for an image of the Great Hall, you would fill out this field as follows ‘Great Hall building on campus’.
If the image is of an individual, or two or three people, then add the name of the individual or people in the description and where they work and/or study.
- Keywords – the Keywords field is where you can add any words associated with the image. You should try and be as descriptive and think as broadly as possible to enable other users to find your image. For example, for an image of the Great Hall taken on a snowy winter morning, you would enter keywords such as: great hall, campus, buildings, red brick, winter, snow, cold, morning, white, blue
In a multiple image upload, keywords should be tailored to each individual image, don’t just copy and paste across all your images.
- Date Created – this field will be automatically filled in with the date you are uploading the image. If it is blank, click the calendar icon and select the date that you are uploading it
- Active Status – here you can set the status of the image as expired, inactive or active. Active will be selected by default and you should not change this field when you are uploading. Expired /inactive will only apply once your image has been uploaded and you need to remove it from view
- Activation Date – click the calendar icon and select the current day you wish the image to become active. By default you should select the same day that you are uploading
- Expiry Date – if you want your image to be available only for a specific period, click the calendar icon and set an expiry date. This will hide your image from view to other users from the specified date.
Any images depicting students need to be set to automatically expire after three years. As fashion and technology change rapidly, images older than three years will begin to look dated.
However, this does not apply to people in the events category, staff photos or images taken for the Reporter. These must remain active for archival purposes.
Once you have completed this information for all images they will be saved onto the image library.
Categorising your images (metadata)
Here is an example of what happens when you bulk upload and don’t refine the metadata. The same metadata is used for all images and is not relevant.
Categories – it is important that you categorise your image(s) correctly. This will enable other users to find it easily.
For shots of a single person, shots where no one person is identifiable or shots of buildings, please select only one appropriate category.
Single categories:
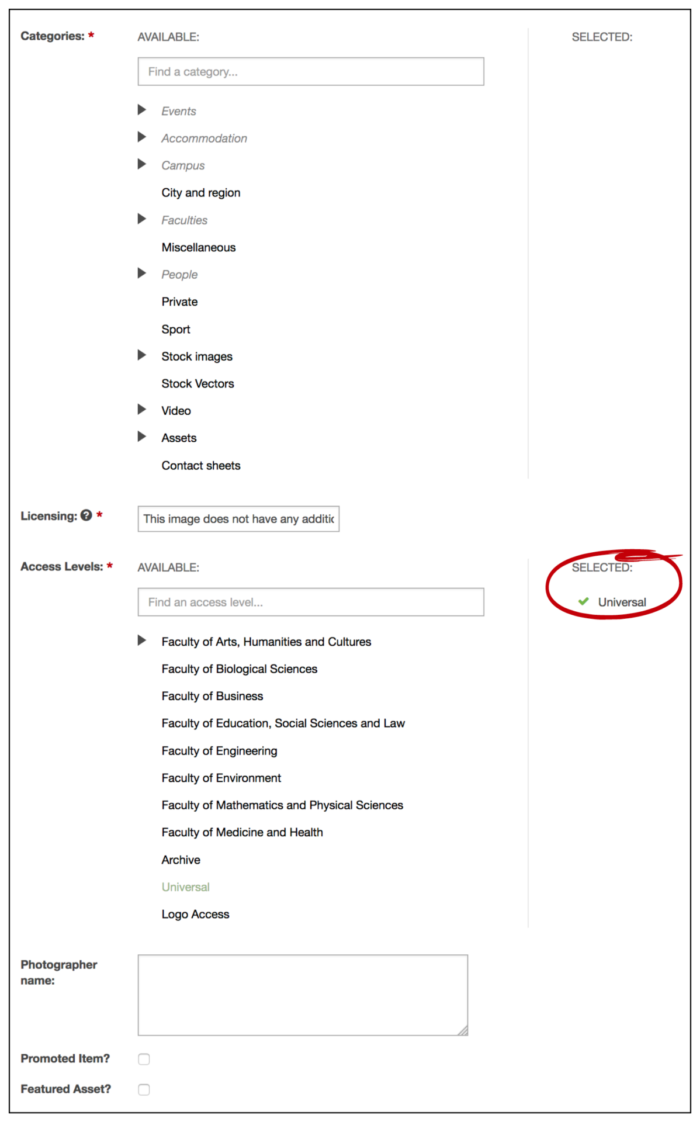
You should select the most appropriate category from the AVAILABLE list. If the category has an arrow symbol next to it, please click this to see the sub-categories.
When you click a category it will be added to the SELECTED list on the right and have a green tick next to it.
Additional categories:
If your image includes two or more identifiable people or a single person in an identifiable context it is helpful to use additional categories, so it can be easily found.
Examples of when you should use additional categorisation are:
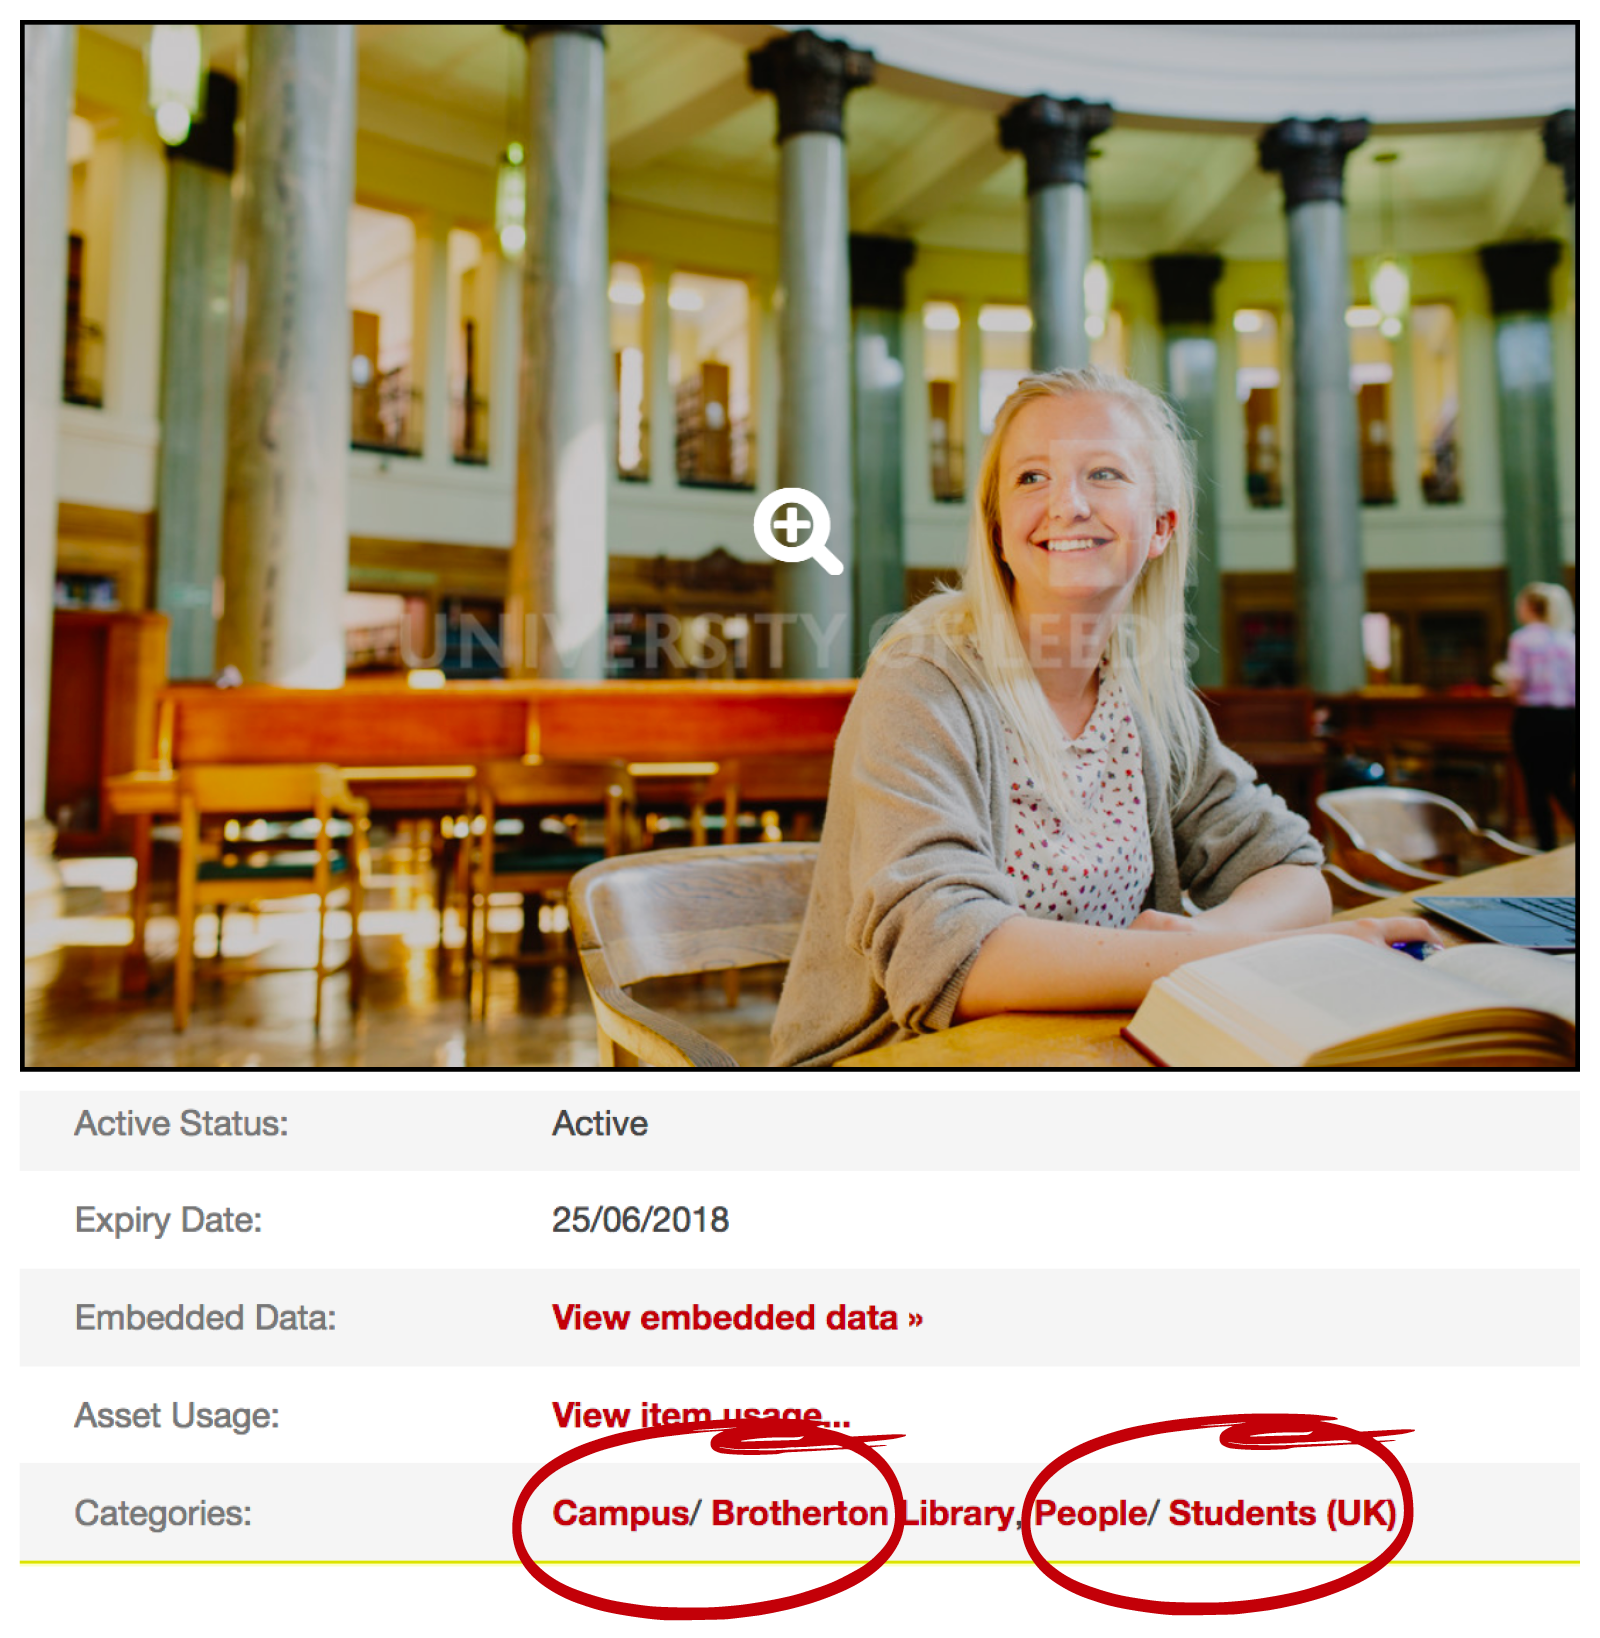
- A UK student inside a building with a non-specific background, but you know is from the Faculty of Business. This would be categorised within ‘Students (UK)’ and ‘Faculty of Business’, with the keywords and description containing the location.
- A UK student who is clearly in the Brotherton Library (see below). This would be categorised within ‘Campus / Brotherton Library’ and ‘Students (UK)
- A shot of international and UK students would be categorised as both ‘Students (UK)’ and ‘Students (International)’.
If your image contains a mix of International and UK students, please use the Description field to identify these students by name and position in the image (if known).
Important points to note when selecting a category
- Events photography should be categorised in the appropriate year and nowhere else.
For example, just because the event is held in the Parkinson does not mean that it should be placed in that category. Include that information in the keywords and description instead.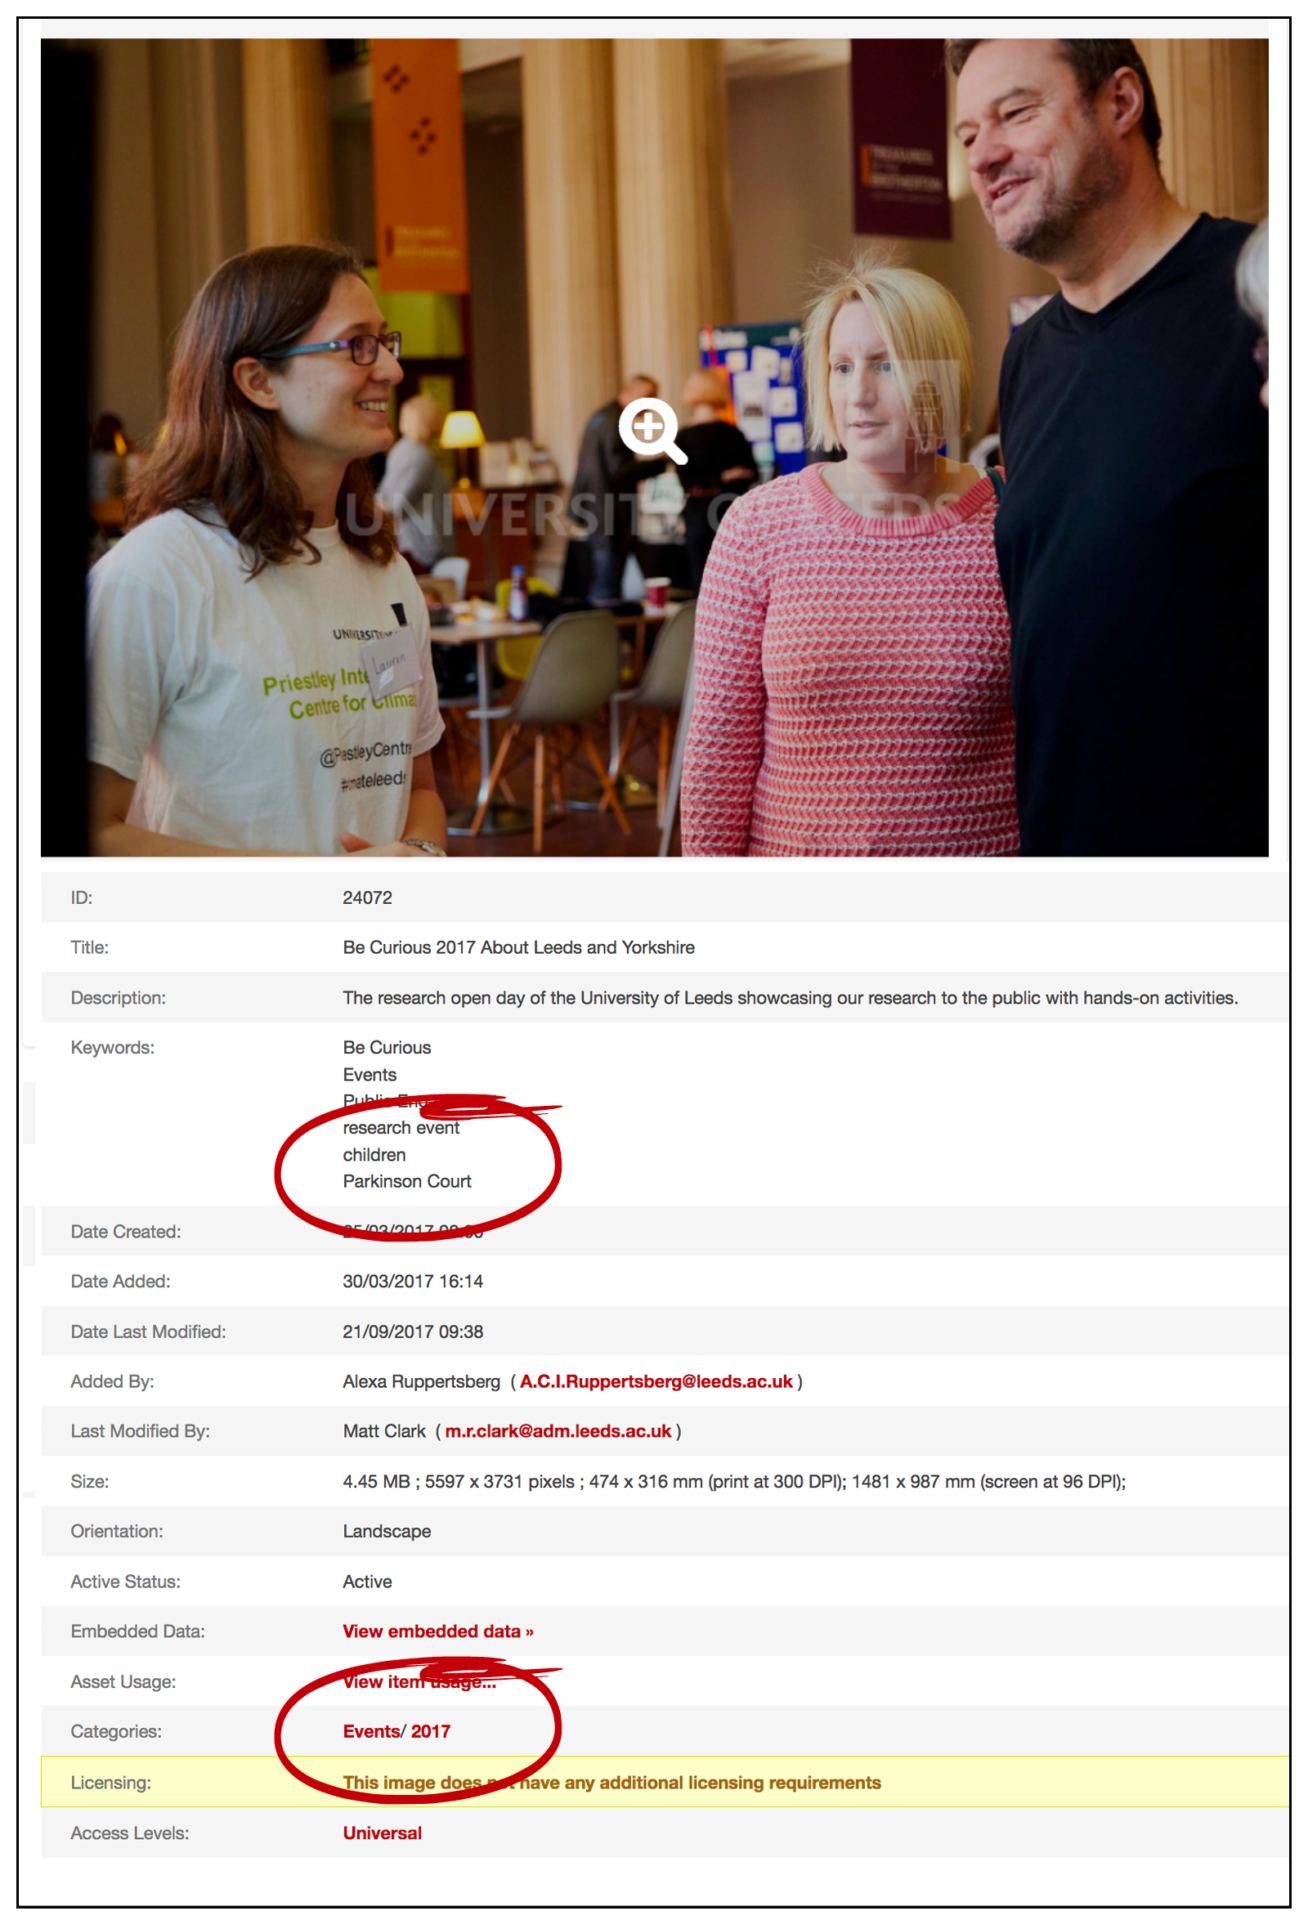
- Don’t categorise something in a campus building category if the main focus is the people. Tag them in the correct people category and use metadata to explain their surroundings.
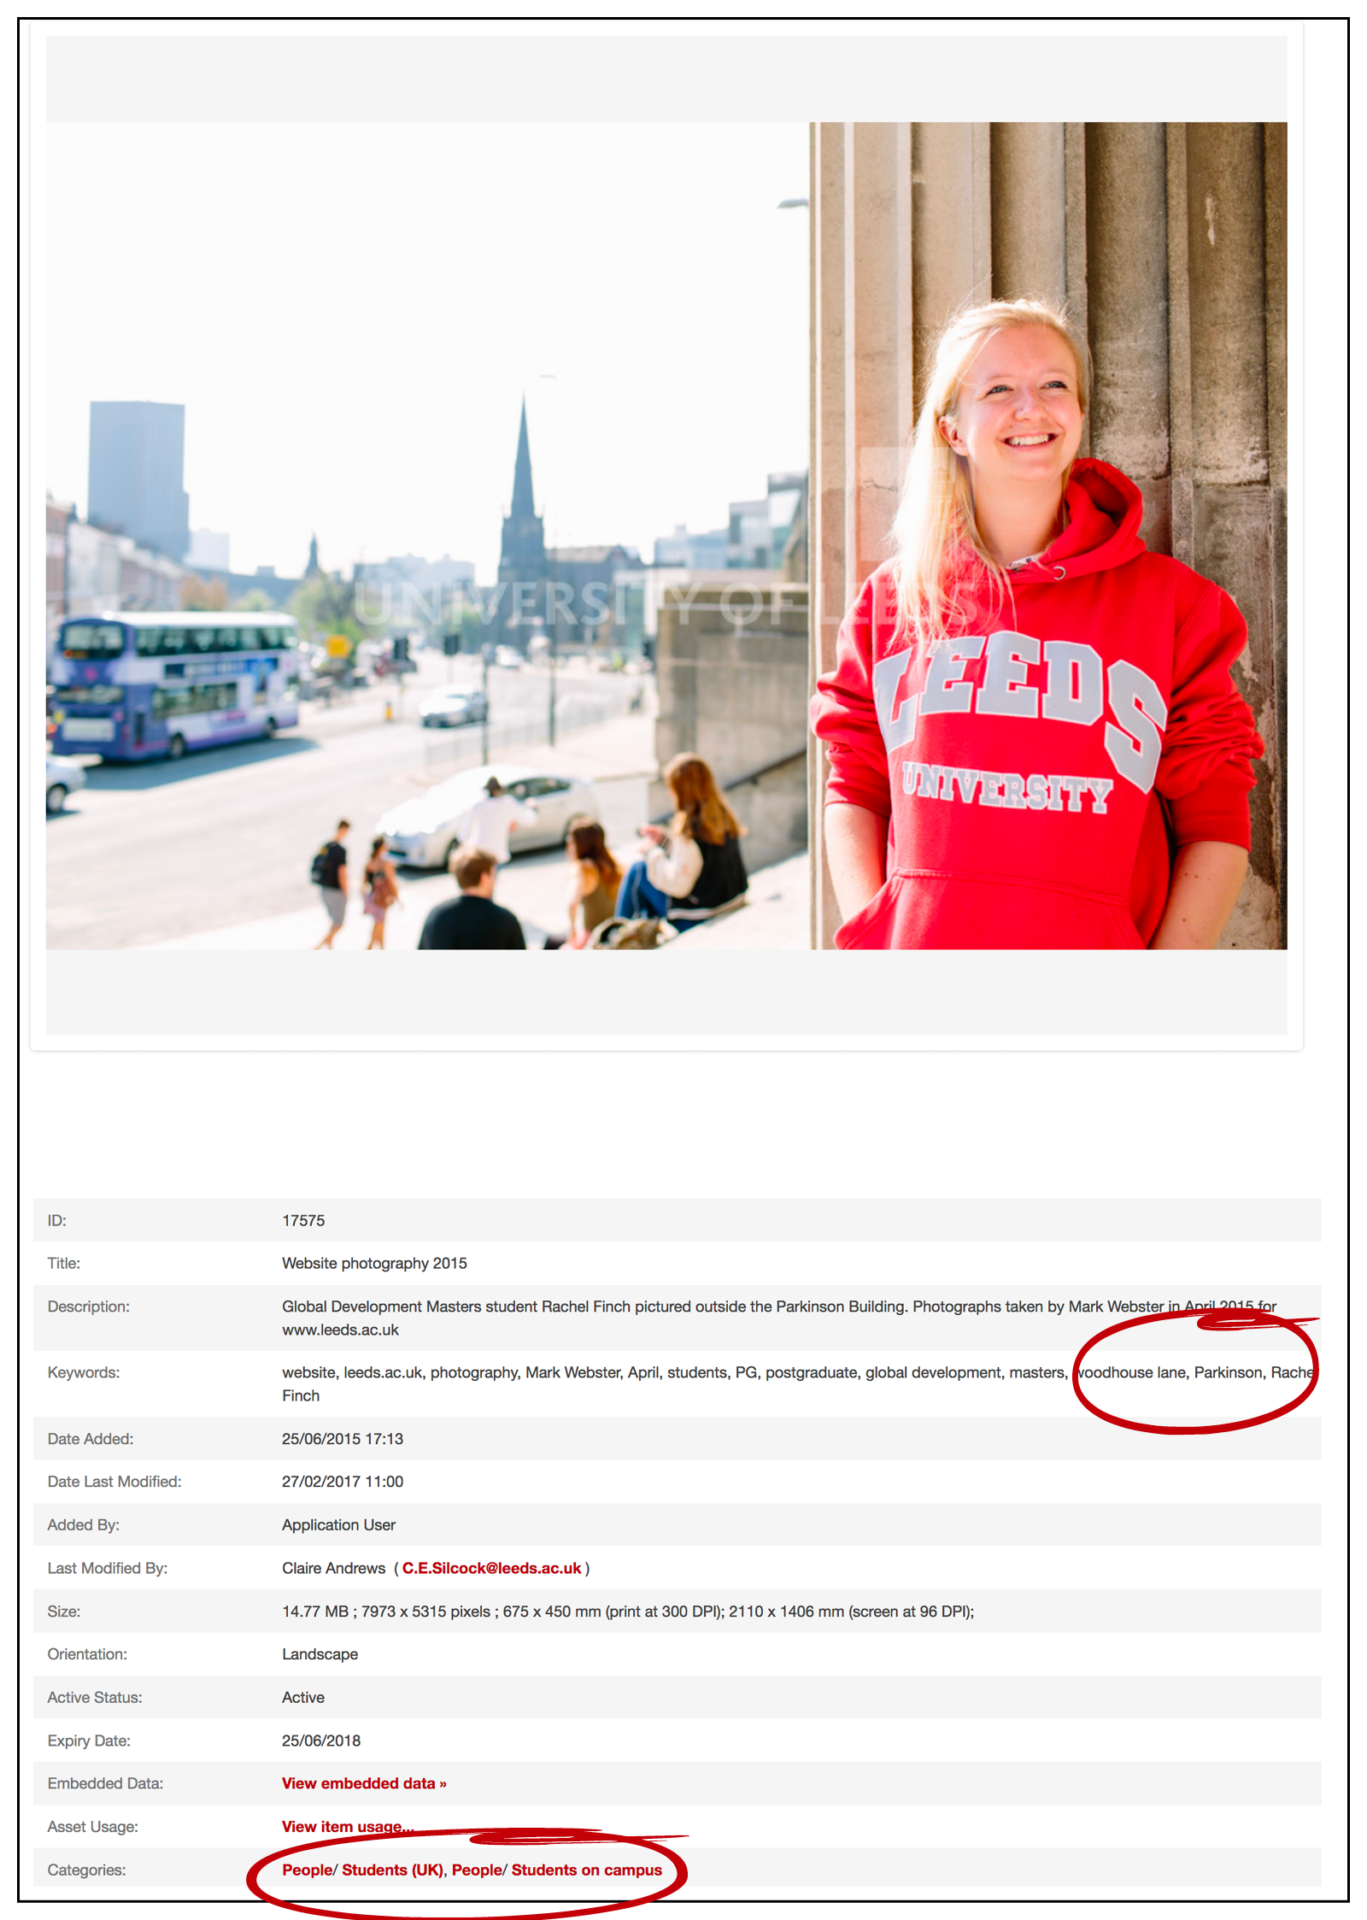
- Add people to the most appropriate people category, eg students on campus, graduation or honorary graduates.
Additional fields to complete
- Licensing - here you can note any restrictions you need to put on the image. For example, if you would like users to contact you for permission before they download the image (provide your email or phone number), or if you would like the image to only be used for specific purposes.
- Access Levels - every user has a Universal access level, so by default Universal will be selected, meaning all users will be able to see your image and request it for download. This should be left selected. Many users also have additional access levels. You can use this section to make your image available for download without approval by users with certain access levels.
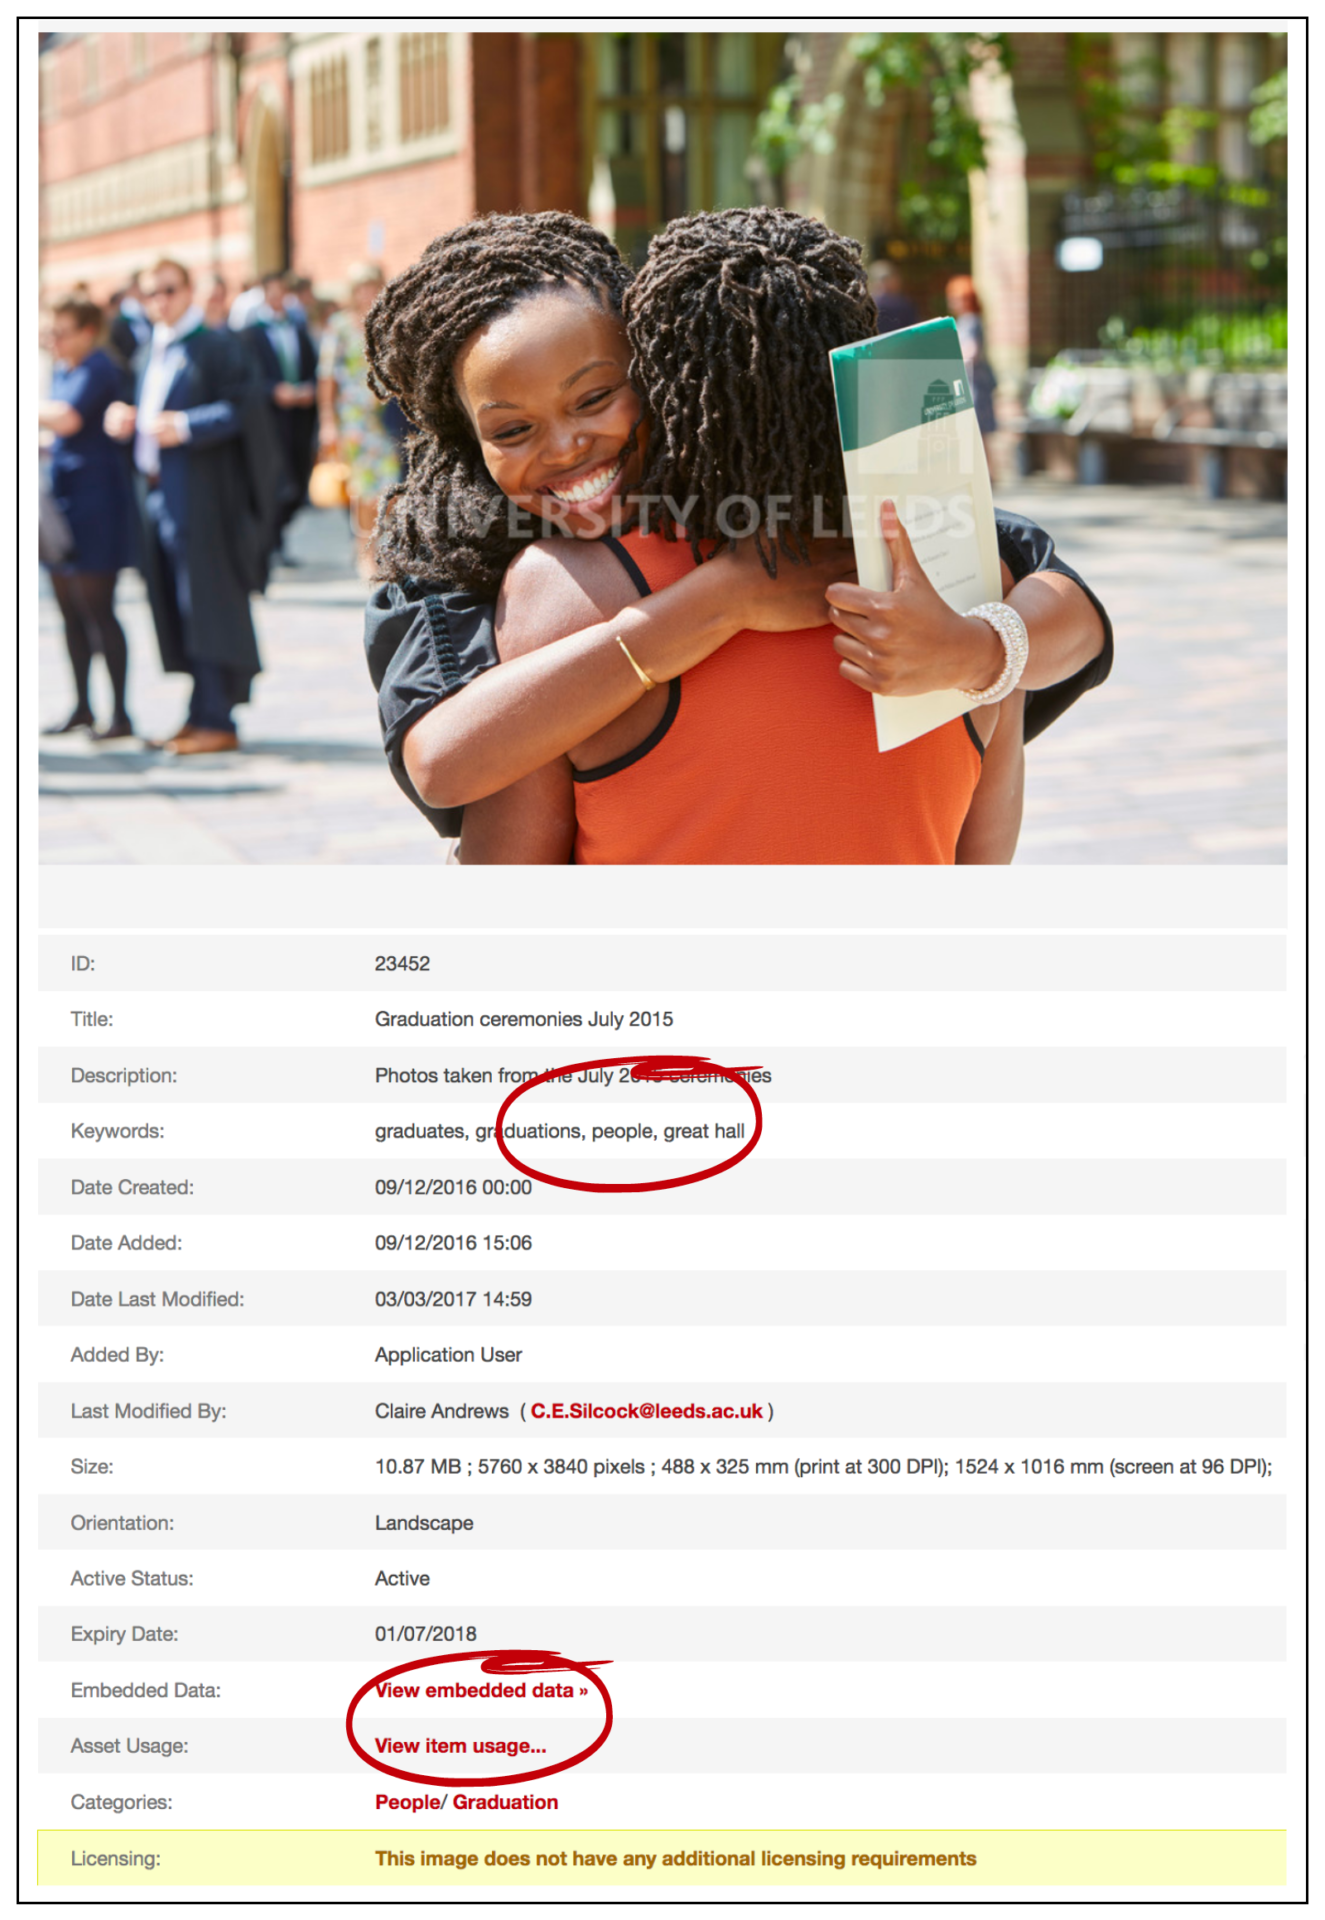 For example, if you are uploading an image taken for the Faculty of Engineering you should also tag your image in that access level. This will mean any user who is part of the Faculty of Engineering access level can download your image without approval from the Communications and Engagement team.
 - Photographer Name – always add the name of the photographer (or video production company) in the appropriate field.
- Promoted Item – your image will be shown in the promoted items section on the home page. Please discuss with the Communications and Engagement team before uploading an item to the section. Leave this box unchecked.
- Featured Asset – Featured assets are the assets showcased in the upper right hand corner of the home page. Leave this box unchecked.
You may also see radio buttons before the final Submit button which allow you to choose the manner in which your asset is uploaded to the system:
- Submit to live: on pressing Submit, the item will immediately be live in the system. You should leave this checked in most cases.
- Submit for approval: the item will be passed to an administrator for approval before going live in the system. You should only check this if you are part of a managed workflow.
